I have not been a very big fan of Badhusha from anytime back. It is just that I get curious about its name everytime :P After coming to USA, deprived of good readymade sweets and savouries from sweet shops, I started to try each sweet and so I landed in here, with the making of Badhusha. The toughest part is standing patiently near hot oil, gazing dreamily at the badhushas to get ready soon, while they have just started to cook :P
Prep Time: 15 mins || Cook Time: 35 mins || Yields: 12 || Category: Sweet
Ingredients:
1. Maida - 1 & 3/4 cups
2. Cooking oil - sufficient to fry
3. Melted butter - 1/4 cup + 2tbsp
4. Salt - a pinch
5. Curd - 1 tbsp
6. Sodium bi-carbonate (cooking soda) - 1 tsp
7. Sugar - 2 cups
8. Cardamom powder - 2 tsp
9. Saffron - few strands (optional)
10. Water - as required
11. Lemon - 1
Method:
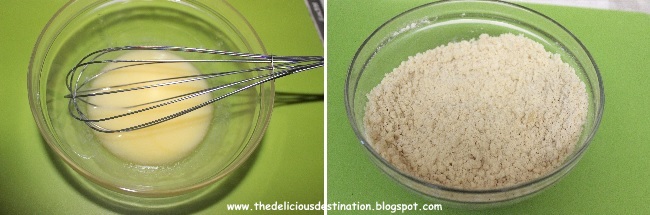
1. Mix melted butter, 1 tbsp of cooking oil, cookign soda, curd, a pinch of salt and 1 tbsp of sugar (if desired) into a smooth paste.
2. To this add maida and mix to form a crumbly mixture initially and then add water little by little to knead into a smooth non sitcky dough.
3. Divide the dough into equal sized rounds and shape them into traditional badhushas or the ones with swirls. For the normal badhushas, take a round and press it gently and make a dent in the center. For the swirl rimmed badhushas, press the round gently, pull the rim outwards, pinching it slightly fold it inwards and repeat the process till the entire rim has been made.
4. For making sugar syrup, in a container add sugar and pour water just sufficient to immerse it and keep stirring in medium flame. When bubbles arise and the syrup thickens, check for one string consistency (the syrup when taken in between two fingers should leave a fine string which should last without getting cut). At this stage, add cardamom powder, saffron and switch off the flame. Add lemon juice and stir well to avoid crystallization of the syrup.
5. Meantime heat oil and test the hotness by dropping a pinch of the dough, which should immediately rise above. At this stage, swtich off the flame and add the badushas one by one with enough distance between them. Let them get cooked for a min. Then flip the badushas and continue cooking until the bubbles and the noise subside.
6. Switch on the flame (after the bubbles and noise subside) keeping it in medium, cook all the badushas with intermediate stirring and flipping to ensure uniform light brown colour and drain them in a tissue.
7. Transfer the badushas to the sugar syrup. If the syrup is cool, just warm it up a little so that the syrup will be absorbed into the badushas well. Rest for about 10-15 mins so that the sugar syrup gets thickened on the badhushas.
Suggestions:
- Can also add a cashew/badam or any nut into the dough balls before shaping them.
- If desired, can add rose essence or any fruit essence for flavour.
- Adding saffron is optional.
- It is better to cook the badhushas soon after they are shaped. Other wise they get dry and form cracks.
- If there are many cracks in the shaped badhusha, they might tend to break when frying in oil.
- In the swirl shaped badhushas, the outer rim will be slightly crisp and the inner part will be soft, unlike the normal badhusha which will be soft throughout.
- Tastes soft and yummy after a day, absorbing all the flavours.
- Need not refrigerate.
Pongal is one of the quickest one-pot breakfasts that many of us might be preparing with ease. It is in general a key neivedhyam for the harvest festival - Pongal. But we prepare only the sweet version of it during the festival. This venpongal does not demand much standing near the stove or stirring periodically. I go for this mostly on a weekend, when I have no patience to stand for even half an hour for the breakfast process :P
This dish, apart from the ease of making, also keeps hunger at bay for longer time than the other breakfast items, giving a lavish time for the preparation of next course of meal :D
Cook Time: 30 mins || Serves: 3 || Category: Breakfast
Ingredients:
1. Raw rice (pacharisi) - 1/2 cup
2. Moong Dal - 1/2 cup
3. Water - 3 cups
4. Ghee - 3tbsp
5. Ginger - 2tsp
6. Cashews -10/15
7. Cumin seeds (jeera) - 2tsp
8. Whole black Pepper - 2tsp
9. Hing (asafoetida) -3tsp
10. Salt - as required
Method:
1. Wash moong dal and raw rice together. Add 3 cups of water to it and pressure cook for 4-5 whistles. Can add a spoon of ghee (optional) in the pressure pan , to avoid burnt bottom or browned rice and dal.
2. Mash the rice and dal, add ghee and mix well. In a pan add 2tbsp ghee and temper with jeera, pepper (should splutter). Then add cashew, chopped ginger, hing & lastly add the curry leaves and transfer the tempering to the pongal and mix well with required amount of salt.
Suggestions:
- Adding a little ghee along with rice and dal in pressure pan gives a good texture.
- Soaking the rice and dal mixture for 30 mins before cooking enhances the texture and taste.
Serve with coconut chutney or any gotsu..
Felt like having Bhel Puri after watching one of the episodes of "Samayal Samayal" in Vijay TV. So, I jumped into making Omapodi / Plain Sev for the second time. If made in a lesser quantity just enough to last for a day or two, it can be made within 30 mins. For the first time when I tried making this, I used only half of the quantity mentioned here, as it was on an experimental basis.
This is snack finds its place in our home, mostly during deepavali when making mixture. On the normal days, mom gets it from Adyar Anandha Bhavan especially for my grandma, who finds this snack easier to eat :D The store bought one looks so much finer than the home-made one. This fineness & mild spice level makes it a kids & grandparents friendly snack :P
It can be had as a light tea time snack or for garnishing in various Chaat items. As i was tempted to make and have Bhel Puri, I tried with Himalayan efforts to retain some of this omapodi for 2 3 days as I wanted time to make the red, green & imli chutney for Bhel Puri. But my efforts as usual ended in vain, as I could not make the chutneys on time due to my lazinessss. May be next time, all the chutneys first & then the sev !!!
PreparationTime: 15 mins || Cook Time: 25 mins || Yields: 3 jars || Category: Snack
Ingredients:
1. Besan Flour (Kadalai Maavu/Gram flour) - 2 cups
2. Rice Flour (Arisi Maavu) - 1/2 cup
3. Ajwain (Omam) - 1 tbsp
4. Butter - 1tbsp
5. Asafoetida /Hing - 2tsp
6. Salt - as required
7. Oil - For deep frying
Method:
1. Take ajwain in a cup & add water to it. Microwave for a min & set aside for it to cool down. Crush it with hand and filter its essence on to both the flours taken in a bowl. Repeat soaking in hot water and filtering if more flavour is needed. Add melted butter, hing, salt and little oil and mix the flours. Add water only little by little as it does not take in much water & prepare a thick dough.
2. Take a murukku press & attach the plate with finer holes, fill up the press with the dough & close it tight. Meanwhile heat oil in a pan & drop in a pinch of the dough to check the hotness of oil. If the dough raises, then the level of hotness is just right. If not heat it for few more minutes and then proceed with the test.
3. When the oil is hot, keeping the flame in medium, operate the presser well above the oil in circular motion. After about a min, flip the omapodi to its other side and cook evenly. When the bubbles and oil sound cease (roughly after a min), take out the omapodi in a perforated laddle and drain the excess oil in a kitchen tissue.
Suggestions:
- Try to avoid too much overlap of the omapodi strands as the sev might not get space to get properly cooked.
- Keep the dough covered until use, otherwise it becomes hard & you will have a tough time pressing it. If it gets harder, can add 1 spoon of hot oil and knead well before filling in the press.
- Adjust the flame to low or medium in between refilling the press or while cooking the sev as necessary, to ensure the oil does not get heated up too much.
- Hold the press firmly well above the oil & operate the handle as quick as possible to avoid the heat from the oil reaching the hands.
- Can also add chilly powder or garlic if you like the flavour & make garlic sev.
- Adding too much of ajwain can give a bitter taste.
- Crumble the sev into small pieces & store it in an air-tight container.