Thursday, August 27, 2015

Jhal Muri (Kolkata's famous street food)


     With so much self-control, I had been preserving some omapodi (plain sev), wanting to use it in a chaat. I was browsing for some recipe & finally landed into various sites showing a popular snack / stree-food of Kolkata using puffed rice. The recipe sounded simple and similar to Bhel Puri. I was happy with the fact that this recipe didn't require the sweet chutney or green chutney or papdi as in the case of Bhel Puri (as I was not ready to make all of them but still wanted a good murmure to eat :P ). Read that this Jhal Muri is a favourite street-food in Kolkata. This 'Jhal Muri' is the version of dry Bhel Puri that is made in Kolkata. Jhal Muri means 'spicy puffed rice'. They use various spicy powders & mustard oil in making this snack.

Now over to the recipe.......

Prep Time: 15 mins || Roasting Time: 5 mins || Serves: 2 || Category: Chaat / Street-food

Ingredients:
1. Tomato - 1 cup (chopped)
2. Onion - 1 cup (chopped)
3. Cucumber - 1 cup (chopped)
4. Boiled potato - 1 cup (cubed)
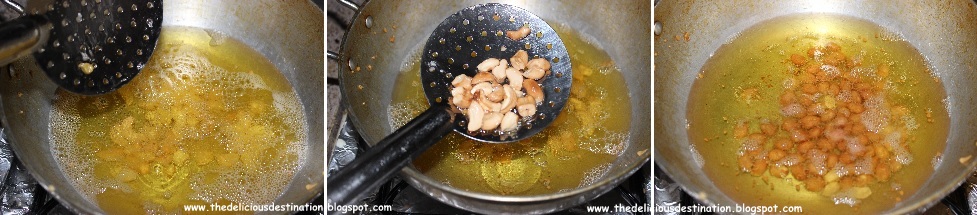
5. Groundnuts - 1/2 cup (dry roasted)
6. Coriander leaves - 1/4 cup (finely chopped)
7. Tamarind paste - 2 tbsp
8. Chaat Masala - 2 tsp
9. Roasted cumin powder - 2 tsp
10. Aamchur powder (Dry raw mango powder) - 2 tsp
11. Dry red chilli powder - 2 tsp
12. Salt - as required
13. Oil - 1/2 tbsp (Mustard oil preferred)
14. Hing - 2 tsp
15. Omapodi (Plain sev) - 1 cup
16. Puffed rice (Pori) - 1 cup (dry roasted)
17. Lemon Juice - 2 tbsp (optional)

Method:
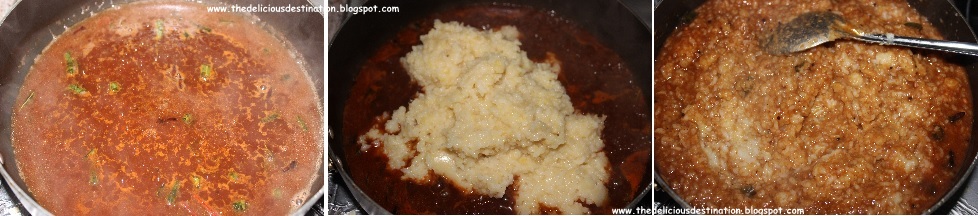
1. Have all the ingredients in place. Soak tamarind in hot water, sufficient to give around 2 tbsp of juice. Extract the juice and keep aside. Mix all the chopped vegetables, the masala powders, salt, hing, raosted groundnuts in a bowl & mix well with the tamarind juice. If desired, add mustard oil at this stage.
 2. Add puffed rice (dry heated on a pan), omapodi, coriander leaves and mix well. If desired, add lemon juice and mix well. 

Suggestions:

  • Black salt can also be added to the spice powders (I omitted it as I didn't have it).
  • Original recipe calls for mustard oil, which gives the exact regional flavour of the dish. (I don't prefer the smell of mustard oil & also any other oil in this chat. Hence I omitted)
  • If you have any pickle, 2 tsp of the oil floating on the pickle can also be used instead of mustard oil.
  • Dry roasting the grounduts & the puffed rice gives a good crispy texture.
  • Adding lemon juice is optional.
  • Add puffed rice & sev just before serving, otherwise they get to become soggy due to the water content in the chopped vegetables.

Serve in paper cones for a street-food effect. Enjoy with hot tea / coffee !!!

Wednesday, August 26, 2015

Mixture (Madras Mixture)

     Long back on a weekend, I was all set to make Madras Mixture for a birthday party. I was planning so much before hand on minimizing the regular cooking to something very simple on Sunday and saving the energy for the mixture project :D As my mom says, this is not a so very difficult snack to make, but as I was taking pics at each and every stage of making the Plain Sev, Kara Boondhi, frying groundnuts, flattened rice & other additives, it took me a long time (with multiple breaks in between). Felt contented to see the end product and had a sense of satisfaction that it is home made & that too by me :P
     Usually this mega savoury is prepared at home only during diwali. Boondhi laddu & mixture happen to be the standard sweet & savoury combo at home for diwalis. While I am confident of making mixture, I am yet to get a little perfection with boondhi laddus.

Okay now over to the recipe :)


Prep Time: 5 mins || Cook Time: 25 mins || Yields: 5-6 cups || Category: South indian savouries/ festival savouries

Ingredients:
1. Omapodi (Plain Sev) - 2 cups
2. Kara Boondhi - 2 cups
3. Cashews - 15-20
4. Peanuts - 1/2 cup
5. Roasted gram dal (pottukadalai) - 1/2 cup
6. Flattened rice (Aval/poha) - 1/2 cup
7. Curry leaves - 10-12
8. Oil - sufficient for frying
9. Salt - as required
10. Asafoetida - 4 tsp
11. Turmeric powder - 1 tsp
12. Red chilli powder - 1 tbsp

Method:
1. Fry the cashewnuts until golden brown. Drain the excess oil if any, in kitchen tissue. 
 2. Add groundnuts and fry them till light brown. Drain the excess oil if any, in kitchen tissue. Add roasted gram dal. As it get fried, add the curry leaves on top of it, standing at a safe distance from the stove, to avoid oil splutters. After the popping sound of the curry leaves subsides, give a quick stir and remove the ingredients from oil using a perforated laddle & drain in a tissue paper.
 3. Lastly add the flattened rice (aval) and add a tsp of turmeric powder & fry for a min. When the bubbles subside to an extent, take off the fried aval and drain the excess oil in tissue.
 4. Take all the fried ingredients along with omapodi & boondhi & add required amount of salt, hing, red chilli powder & toss well.

Suggestions:

  • Can fry cashewnuts in ghee instead of oil. If frying in oil, it is better to do so before frying other ingredients, when the oil is fresh.
  • Adding turmeric powder while frying aval is optional. I add it as I dont like the aval showing up in white colour in the mixture.
  • Can also add potato chips/ plain corn flakes (fried)/ broken karasev/ thenkuzhal/ jeeraga mittai etc.


Tuesday, August 25, 2015

Gongura Thokku & Rice

    
     Was aiming to replicate the Gongura Thokku of "Grand Sweets & Snacks" which I used to buy when I was at Chennai. The attempt turned out a success, tasting close to it. When I was staying alone in Chennai, I would come back from work and mostly tend to have these ready to eat rice mixes from Grand Sweets. I love them a lottttt......... I miss the taste of those thokku varieties here in USA as they are not available. I couldn't order these through some providers & wait for even 3 -4 days for this to be shipped from Chennai as my craving for this increased multifold on a day. So, researched and made one variety to start with. Have to keep it going with other varieties too.. Pulikachal, tomato thokku etc !! coming up sooooooooooooon.....


Prep Time: 20 mins || Cook Time: 15 mins || Yields: 150 gms || Category: Thokku / Rice Mix

Ingredients:
1. Gongura leaves - a bunch
2. Tamarind - lemon sized ball
3. Gingelly oil - 4 tbsp
4. Urad Dal - 2 tbsp
5. Fenugreek seeds - 1 tsp
6. Dry red chilies - 2 (long)
7. Salt - as required
8. Hing - as required
9. Mustard seeds - 1 tsp
10. Curry leaves - 1 sprig

Method:
1. Sort the gongura leaves; Wash them and drain the water. Chop the leaves roughly. Soak tamarind in hot water and set aside. In a pan, add little oil & saute the gongura leaves until it turns slightly pale brown and reduces in volume. 
 2. Transfer the sauted gongura leaves to a container and let it cool. In the same pan, add gingelly oil and fry urad dal, fenugreek seeds, red chillies until golden brown.
 3. Allow the roasted ingredients to cool & then add them to a mixie jar along with sauted gongura leaves, salt, hing. Grind it to a smooth paste without adding water. 
 4. Extract juice from the tamarind soaked in hot water. In the same pan, add some gingelly oil and add mustard seeds (I didn't use mustard seeds). After they splutter, add urad dal & curry leaves and fry for a min.
5. One the urad dal has turned brown, add the tamarind juice and cook for about 2-3 mins. Then add the gongura paste and salt and mix well. Cook for another 2 mins, adding some gingelly oil, if desired & switch off the flame.

Suggestions:

  • As gongura by itself has a slight sour/tangy taste, be cautious in the amount of tamarind paste added, otherwise it will turn out to be too tangy for a side-dish.
  • Any oil can be used in the place of gingelly oil.
  • Mustard seeds can be added while tempering (I skipped it as I didn't want the mustard flavour).
  • Stays good for 4-5 days when refrigerated (Not sure after that, becoz the thokku got over around 4 days :P )

Enjoy the gongura thokku as a side-dish for idly/dosa/chappathi etc. or mix it with hot rice & gingelly oil and enjoy it as gongura rice !!!

Monday, August 24, 2015

Hara Bhara Tikki / Spinach Aloo Cutlet

     
     This Hara Bhara Tikki / Cutlet was so promisingly tasty to look, in Venkatesh Bhat's show, that as I was watching the program, I knew for sure I would make it one day !! It was so delicious that I could not stop myself from eating more than 1 tikki :P ( Yes.. I munched on 4 at a stretch !!! ) In any form, in general I like the flavour of coriander leaves a lot. This tikki offers flavours more than that. A blend of spinach, peas, coriander leaves and spices..
Felt like having this tikki as a side dish for jeera pulav for lunch. As usual, I could n't make jeera pulav, as I had to take rest after trying out this new dish :D

Now, lets go to the recipe...........


Prep Time: 20 mins || Cook Time: 10 mins || Yields: 10 cutlets || Category: Starter/Snack

Ingredients:
1. Spinach - 1 bunch
2. Potato - 1 
3. Green peas - 50 gms (handful) 
4. Sugar - 2 tsp
5. Ginger - small piece
6. Green chilly - 1 small
7. Coriander leaves - as desired
8. Salt - as required
9. Asafoetida - 2 tsp
10. Amchur Powder (Dry Mango powder) - 3 tsp
11. Chat masala - 2 tsp
12. Besan flour (Gram flour) - 2 tbsp
13. Oil - 3 tbsp

Method:
1. Boil potato with a pinch of turmeric powder added in water; peel its skin and keep aside. Boil green peas in water for about 10 mins or until it is cooked (I used frozen green peas). In a pan add 200 ml of water and bring it to boil. To this add sugar and then add the cleaned and washed spinach leaves and give a stir. Blanch the spinach in the boiling water for about 2 mins.
 2. After 2-3 mins, spinach would have become cooked & reduced in volume. Switch off the flame and filter the spinach from water. Run through cold water to reduce the heat & retain its colour. To the blanched spinach, add boiled peas, ginger, coriander leaves, green chilly and grind to a smooth paste without adding water.
 3. To the spinach paste, add well mashed potato, chat masala, hing, amchur powder (for mild tanginess), salt and mix well. Slightly wet the hands and make balls of desired size, flatten them and place them on a tawa/pan drizzled with oil.
 4. Flip and cook both the sides until slightly brown, adding oil as required. Yummy green cutlets are ready !!! 

Suggestions:

  • Adding sugar helps to retain the green colour of spinach. Adding sugar is optional.
  • After running the spinach through cold water, it is better to squeeze them to get rid of water. Else the the ground paste will tend to be a little watery. ( I forgot to squeeze the water from spinach. So I had to keep the paste in fridge for a while to make it a tighter mass).
  • The tikkis can also be deep fried, if you are not much conscious about the calories.
  • If you do not have amchur powder, it can be skipped.

Serve hot with tomato ketchup or any tangy chutney.

Wednesday, August 19, 2015

Palkova / Thirattipal (Homemade - from the scratch recipe)

     Palkova/Thirattipal is my all time favourite sweet. Sentimentally, wanted to make the 25th post as some sweet. At the same time I was so much craving to have palkova. I did not want to use condensed milk & wanted to make it from scratch using just milk & sugar. All it needs is a lot of patience to stir and to wait to stir and to wait..... 
     Long ago, during my school days, paati used to make this whenever she boils milk and it turns curdled. I never liked her idea of making palkova from curdled milk. But finally I give up some of my stubborness & ego & do have a few spoonfuls of it :P It tastes good too.
After some days, we somehow gave up this way of making palkova & switched over to the below proper version. 
    Patience is one of the must-have ingredient for a successful palkova without ready-made condensed milk. It took me about 1 hour to get the end product successfully. Unable to stand for such a long time, I pulled in a high-chair and settled down with a bottle of drinking water and a laddle to stir, with the camera hanging around my neck :P It was definitely a funny sight for anyone who came into the kitchen. But, such a patiently made palkova got over within 2 days !!!
    And one very important pre-condition as per me is to talk a deal with someone at home & bribe someone with additional spoons of palkova, so that they can scrub & clean the kadai for you, after palkova is made :D

Cook Time: 1 hour || Yields: 2 cups (in the cup used to measure milk) || Category: Sweets / Milk Sweets

Ingredients:
1. Milk - 8 cups (I used 2% fat milk)
2. Sugar - 1 & 3/4 cups 

Method:
1. Measure and pour the required quantity of milk in a heavy bottomed kadai / metallic pan. Keep the flame in high & let the milk boil. 
 2. Keep stirring in between to ensure the milk does not overflow from the kadai. Before it rises till the rim of the vessel, during boiling, reduce the flame and keep stirring. Add the sugar and keep stirring in medium flame. Alter the flame to medium or high as necessary & keep stirring. The colour will change from white to creamy/buttery white.
 3. Scrap the inner walls of the vessel for the deposited cream and drop that into the boiling milk. After about 35-40 mins, colour will completely change to creamy white & small bubbles will arise. 
 4. Keep stirring as the milk starts to thicken. This will happen around some 45-50 mins. If a portion of the thickened milk is moved aside with a laddle, it will take time to come back to its position & will reveal the bottom of the vessel. This is the time from which more care is needed. The thickened milk will attain a dropping consistency.
 5. At this stage, keep stirring the palkova. It will show a slightly granular consistency and move as a thick mass with browning of sides of the vessel. Switch of the flame at this point & transfer the palkova to a storage bowl.

Suggestions:

  • I prefer this palkova to be plain & raw with just these 2 ingredients. If you wish, you can add condensed milk in addition to milk. 
  • Adding condensed milk will reduce the process time.
  • Depending on the amount of condensed milk added, remember to reduce the quantity of milk & sugar.
  • This version of palkova will not be ideal for shaping them as pedas. For that using condensed milk gives a better form to handle. This version is perfect for a cup & spoon kind of serving.


Monday, August 17, 2015

Vaazhaikai Podi & Rice

     Vaazhaikai Podi is one of the recipes that I had bookmarked to try from Venkatesh Bhat's program in Vijay TV on Plantain special recipes. Though I used two bananas instead of just one banana which was shown in the program & also with the reduced amount of spices, I felt this end product a little hot and spicy. So, I have documented the ingredients with slightly lesser quantity of chillies and coriander seeds to have it less spicy and to suit my taste buds.
     The recipe when watched in the show, looked so very different and yummy. But only after trying it out I realized that it tasted somewhat familiar..  :D Yes.. it had a taste close to the araichu vitta sambar, as the key ingredients for the podi were almost the same :D
     Overall, it tasted good when mixed with rice & coconut oil & also as a side-dish for curd rice :P

Prep Time: 5 mins || Cook Time: 25 mins (pressure cook) + 20 mins || Yields: 3 cups || Category: Ready mix for rice / side-dish

Ingredients:
1. Raw Banana - 2
2. Turmeric Powder - 2tsp
3. Salt - as required
4. Dry red chillies - 6
5. Bengal gram - 3 tbsp
6. Toor dal - 1 & 1/2 tbsp
7. Coriander seeds - 3/4 tbsp
8. Pepper - 1 tsp
9. Cumin seeds - 1 tsp
10. Coconut oil - 3 tbsp
11. Mustard seeds - 1 tsp
12. Urad dal - 3 tsp
13. Curry leaves - a sprig
14. Hing - 2 tsp

Method:

1. Wash the bananas and cut each of them into two or three pieces. Immerse them in water in a pressure pan. Add some turmeric powder and salt to it. Pressure cook for 5-6 whistles. Meanwhile, in a pan add 1 spoon of coconut oil and roast the red chillies and transfer them to a plate.
2. To the same pan, add bengal gram, toor dal & coriander seeds and roast them. Before they are done, add pepper and cumin seeds and roast all the ingredients till golden brown & transfer to a plate to cool down.
3. Once the banana is cooked, drain the hot water and run in some cold water and rinse the bananas. The outer skin can now be easily peeled off from the bananas. Mash all the peeled bananas. Transfer the roasted ingredients to a mixie jar and powder them smoothly.
4. In a pan, add some coconut oil and then temper with mustard seeds, urad dal, curry leaves & hing. Transfer this tempering to the mashed bananas. Add the ground powder & required amount of salt and mix well. Vaazhaikai Podi is done !!

Suggestions:
  • Can adjust the quantity of red chillies, coriander seeds based on one's desired spice level.
  • Coconut oil gives a nice aroma. But, any other oil can be used.


Mix with hot cooked rice & hot gingely oil / coconut oil / ghee & enjoy with fryums or any side-dish... Tastes yummyyy even without side-dish !!!


Thursday, August 13, 2015

Bisibele Bath (Mysore style original recipe)

     It has been my longtime wish to make an original mysore style bisibele bath. Whenever I googled in thirst of finding out the original recipe, I landed in websites that mostly add all sort of vegetables and literally offer the recipe of a sambar sadham disguised in the name Bisibele Bath :P While I was wondering if there will be no difference at all between a sambar rice and bisibele bath, I happened to watch the Samayal Samayal show by Venkatesh Bhat where he showed how to prepare a proper mysore style Bisibele Bath :)
     Adapting the recipe from the show, I tried it out one day and clicked the pics for reference & added to this repository. It came out delicious !!! fulfilling my longtime wish of a good bisibele bath. 

Cook Time: 25 mins (for rice & dal) + 15 mins || Serves: 3 ||  Category: Lunch / Variety Rice

Ingredients:

1. Raw White Rice (Pacharisi) - 1 cup
2. Toor Dal - 1/2 cup + 2 tbsp
3. Ghee - 3 tbsp
4. Mustard seeds - 1 tsp
5. Urad Dal - 2 tsp
6. Cinnamon - 2 pieces
7. Cloves - 5-6
8. Curry leaves - 1 sprig
9. Tamarind water - 3/4 cup
10. Jaggery - 2tsp
11. Hing - 2tsp
12. Bisibele bath powder/paste - 1 & 1/2 spoon
13. Salt - as required
14. Cashews - 8-10
15. Coriander leaves - 1 tbsp finely chopped

Method:
1. Wash rice & toor dal together and pressure cook them with 4&1/2 to 5 cups water for 5-6 whistles.
2. In a pan, add some ghee and fry the cashewnuts to golden brown colour, transfer to a bowl & keep aside.
3. In the same pan, add 2 spoons of ghee and add mustard seeds. Once they splutter, add urad dal and reduce the flame to low. Once the urad dal turns brown, add cinnamon, cloves and curry leaves and fry them for a min. Then increase the flame and add the tamarind water. Let it boil for 5 mins until the raw smell fades away.
4. Add jaggery if desired and boil the tamarind paste for 2-3 mins. Now add Bisibele bath powder / paste and mix well. Allow it to cook for 2-3 mins. 
5. Add water if required and boil for 2 mins. Now reduce the flame and add the cooked rice & dal mixture. Mix well without any lumps.
6. Add salt, fried cashew nuts & coriander leaves. Mix well & switch off the flame after a min. If required, can add some ghee and mix well before switching off the flame.

Suggestions:

  • Add urad dal only after the mustard seeds have spluttered. Fry the urad dal to golden brown colour, in reduced flame only.
  • Adding jaggery is optional. It adds flavour by enhancing the tanginess.
  • Can use bisibele bath powder/paste, whichever is available.

Serve hot with onion raita, fryums or papad.

Friday, August 7, 2015

Pongal / Venpongal

     Pongal is one of the quickest one-pot breakfasts that many of us might be preparing with ease. It is in general a key neivedhyam for the harvest festival - Pongal. But we prepare only the sweet version of it during the festival. This venpongal does not demand much standing near the stove or stirring periodically. I go for this mostly on a weekend, when I have no patience to stand for even half an hour for the breakfast process :P
     This dish, apart from the ease of making, also keeps hunger at bay for longer time than the other breakfast items, giving a lavish time for the preparation of next course of meal :D

Cook Time: 30 mins || Serves: 3 || Category: Breakfast

Ingredients:

1. Raw rice (pacharisi) - 1/2 cup
2. Moong Dal - 1/2 cup
3. Water - 3 cups
4. Ghee - 3tbsp
5. Ginger - 2tsp
6. Cashews -10/15
7. Cumin seeds (jeera) - 2tsp
8. Whole black Pepper - 2tsp
9. Hing (asafoetida) -3tsp
10. Salt - as required

Method:
1. Wash moong dal and raw rice together. Add 3 cups of water to it and pressure cook for 4-5 whistles. Can add a spoon of ghee (optional) in the pressure pan , to avoid burnt bottom or browned rice and dal.
2. Mash the rice and dal, add ghee and mix well. In a pan add 2tbsp ghee and temper with jeera, pepper (should splutter). Then add cashew, chopped ginger, hing & lastly add the curry leaves and transfer the tempering to the pongal and mix well with required amount of salt. 

Suggestions:

  • Adding a little ghee along with rice and dal in pressure pan gives a good texture.
  • Soaking the rice and dal mixture for 30 mins before cooking enhances the texture and taste.


Serve with coconut chutney or any gotsu..