Friday, July 31, 2015

Omapodi / Plain Sev

     Felt like having Bhel Puri after watching one of the episodes of "Samayal Samayal" in Vijay TV. So, I jumped into making Omapodi / Plain Sev for the second time. If made in a lesser quantity just enough to last for a day or two, it can be made within 30 mins. For the first time when I tried making this, I used only half of the quantity mentioned here, as it was on an experimental basis.
     This is snack finds its place in our home, mostly during deepavali when making mixture. On the normal days, mom gets it from Adyar Anandha Bhavan especially for my grandma, who finds this snack easier to eat :D The store bought one looks so much finer than the home-made one. This fineness & mild spice level makes it a kids & grandparents friendly snack :P
     It can be had as a light tea time snack or for garnishing in various Chaat items. As i was tempted to make and have Bhel Puri, I tried with Himalayan efforts to retain some of this omapodi for 2 3 days as I wanted time to make the red, green & imli chutney for Bhel Puri. But my efforts as usual ended in vain, as I could not make the chutneys on time due to my lazinessss. May be next time, all the chutneys first & then the sev !!!

PreparationTime: 15 mins || Cook Time: 25 mins || Yields: 3 jars ||  Category: Snack

Ingredients:

1. Besan Flour (Kadalai Maavu/Gram flour) - 2 cups
2. Rice Flour (Arisi Maavu) - 1/2 cup
3. Ajwain (Omam) - 1 tbsp
4. Butter - 1tbsp
5. Asafoetida /Hing - 2tsp
6. Salt - as required
7. Oil - For deep frying

Method:

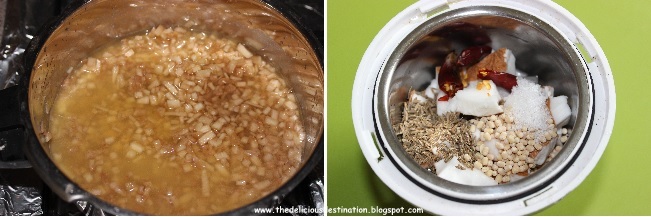
1. Take ajwain in a cup & add water to it. Microwave for a min & set aside for it to cool down. Crush it with hand and filter its essence on to both the flours taken in a bowl. Repeat soaking in hot water and filtering if more flavour is needed. Add melted butter, hing, salt and little oil and mix the flours. Add water only little by little as it does not take in much water & prepare a thick dough.
2. Take a murukku press & attach the plate with finer holes, fill up the press with the dough & close it tight. Meanwhile heat oil in a pan & drop in a pinch of the dough to check the hotness of oil. If the dough raises, then the level of hotness is just right. If not heat it for few more minutes and then proceed with the test.
3. When the oil is hot, keeping the flame in medium, operate the presser well above the oil in circular motion. After about a min, flip the omapodi to its other side and cook evenly. When the bubbles and oil sound cease (roughly after a min), take out the omapodi in a perforated laddle and drain the excess oil in a kitchen tissue.

Suggestions: 

  • Try to avoid too much overlap of the omapodi strands as the sev might not get space to get properly cooked.
  • Keep the dough covered until use, otherwise it becomes hard & you will have a tough time pressing it. If it gets harder, can add 1 spoon of hot oil and knead well before filling in the press.
  • Adjust the flame to low or medium in between refilling the press or while cooking the sev as necessary, to ensure the oil does not get heated up too much.
  • Hold the press firmly well above the oil & operate the handle as quick as possible to avoid the heat from the oil reaching the hands.
  • Can also add chilly powder or garlic if you like the flavour & make garlic sev.
  • Adding too much of ajwain can give a bitter taste.
  • Crumble the sev into small pieces & store it in an air-tight container.


Thursday, July 30, 2015

Godhumai Ravai Upma (Broken/Cracked Wheat Upma)

     Broken wheat / Cracked Wheat / Dalia / Godhumai Ravai  is a nutritious way of consuming wheat as this is not polished. It does not lose out on any of the nutrients which are generally found in whole wheat. Broken wheat serves as a good source of our regular requirement of magnesium and fiber, low in calories and is loaded with nutrients.
     It is high in fiber, a nutrient that offers significant protection against cancer.This contributes to maintaining a healthy body weight. It lowers the risk of type 2 diabetes, reduces the risk of high cholestrol & cardiovascular disease & high blood pressure when consumed regularly. 
     During childhood days, I never used to have a liking for this item in any form - be it in upma or sweetend or salted kanji. The only form I liked it was in Payasam/ Kheer prepared with coconut milk :P  I used to dread this upma & call it as "Mann Upma" in Tamil as it resembles sand particles :D But the aversion has now completely changed and we have it once in a week for breakfast. Trying to include it in Kanji, in salads & in other forms too. 
     Now over to the recipe !!!

Cook Time: 25 mins || Serves: 3 ||  Category: Breakfast

Ingredients:

1. Coconut Oil - 1 tbsp
2. Mustard seeds - 1 tsp
3. Bengal gram (Kadalai Paruppu) - 2tsp
4. Curry leaves - 1 sprig
5. Ginger - 2tsp finely chopped
6. Hing (Asafoetida) - 2tsp
7. Red Chillies - 2
8. Salt - as required
9. Grated coconut - 3tbsp
10. Broken Wheat (Godhumai Ravai) - 1 cup
Method: 

1. Heat coconut oil in a pan and add mustard seeds. Once they splutter add bengal gram, ginger, red chillies, hing & curry leaves and saute in medium flame till bengal gram turns golden brown. Now add 3 cups of water and bring it to boil.

2. Add grated coconut and required salt to the boiling water and cook for a min. Then add a cup of wheat rava with constant stirring.
3. Stir well and make sure there are no lumps. Cook covered for about 5-7 mins. 
4. Check for the doneness & if required add one more cup of water and adjust the salt level and cook for 3-5 mins until the rava has got completely cooked. 

Suggestions: 

  • From the time I remember, we had been using coconut oil for this dish, as it renders a unique aroma. Any other oil can also be used. 
  • Can also add vegetables like carrot, beans, peas etc.

This can be served with any chutney or simply with sugar. I had it with idly milagai podi. !!!

Tuesday, July 28, 2015

Spicy Bread Upma


     Bread Upma is one such recipe I never even tried or thought about when I was in India. Here we buy bread every week and its liking fades away in a day or two :D Then the pack lies abandoned for 2 more days on the counter or over the fridge. Then I check for its expiry and keep reminding myself to use it up well before the date. Only then I started making Bread Upma where I could get to use most of the slices and without a heavy heart discard only the top and bottom most slices :P 
     Apart from various types of sandwiches, toasts, plain bread with butter or jam, this is one other alternative to consume bread adding a tasty twist to it. 
     Have made this multiple times in the last few months and tried it for a potluck too.
With whatever vegetables available at hand, this dish can be made within 30 mins & with no compromise in taste. 

Prep Time: 5 mins || Cook Time: 25 mins || Serves: 3 ||  Category: Breakfast/Kids Recipes

Ingredients:
1. Onion - 2 medium sized
2. Tomato - 2 big
3. Capsicum - 1 small
4. Ginger - 2tsp finely chopped
5. Turmeric Powder - 2tsp
6. Garam Masala - 2tsp
7. Chilly Powder - 3tsp
8. Tomato sauce - 1 tbsp
9. Salt - as required
10. Channa (Chickpea) - 50gm boiled [Optional]
11. Oil - 2tbsp
12. Mustard seeds - 1tsp 
13. Cumin seeds (jeera) - 2tsp
14. Bengal Gram (Kadalai Paruppu) - 2tsp 
15. Coriander leaves - 2tbsp finely chopped
16. Lemon - 1 small [Optional]
17. Bread slices - 8 or 9

Method:

1. Chop all the vegetables, ginger and coriander leaves. In a pan heat oil & add mustard. Once it splutters, add bengal gram, jeera in reduced flame. Once they are golden, add the chopped onions & turmeric powder and saute for 3-4 mins or until half cooked.
2. Add the chopped capsicum, chilly powder & garam masala & saute for about 3-4 mins or until the capsicum is roughly cooked. Add chopped tomatoes & required salt and saute till the tomatoes turn mushy. Now add the boiled chickpeas and tomato sauce for flavour enhancement. Adjust salt, chilly powder as required. Cook for about 2-3 mins and switch off the flame.
3. Now add the bread cubes & mix well. Top with coriander leaves. If needed, squeeze a little amount of lime juice & mix well.

Suggestions:

  • The vegetables added here are only suggestive. This can be altered with any combination of vegetables of one's choice and availability. It can also be left as a simple upma with just sauteed onion, curry leaves, ginger and green chilis.
  • The brown rim of the bread can be and discarded and only the white part can also be used.
  • As I am okay with the taste of the brown edges, I left them as such.
  • Adding lemon juice and tomato sauce are optional.
  • If adding lemon juice, it is always better to add it after the flame is switched off, as it might give a bitter taste otherwise.
  • Can also add golden corn kernels or peas instead of chickpeas for a variation.
  • White bread can also be replaced with whole wheat bread if you are a little health conscious. Variations are endless though :)

Monday, July 27, 2015

Morkootan (Morkuzhambu)

     Called as Morkootan in Kerala & Morkuzhambu in Tamil Nadu, this is such a delicious dish that can be made easily and consumed without guilt, if you are not too health conscious in using coconut once in a while.     
    As this dish stands good easily for 2-3 days, I usually get this gravy a standard place in my backpack on Monday mornings whenever I start to Chennai. This packed morkootan comes in handy for about 2 days whenever I need a home-cooked meal without much effort or a side dish for dosa or idly.
     I had been so much hesitant to try this out thinking that it is a very complex dish :P Every time when i tell my mom, she says this is so very simple. Which I realized after trying out though :P This is a very yummy dish for a rice accompaniment, deviating from the usual sambar or rasam based with tamarind water & cooked dal. It involves neither. The main ingredient is sour thick curd. More the sourness, more the taste. As it is difficult to make the curd sour here, I usually keep the curd out of refrigerator overnight and adjust with its just-turning-sour taste. I will get a proper tasting morkootan only when I goto India :) 

Prep Time: 5 mins || Cook Time: 30 mins || Serves: 3 || Category: Kootan/Rice Accompaniment

Ingredients:
1. Potato - 1 Big
2. Turmeric Powder - 3tsp
3. Grated coconut - 3-4 tbsp
4. Green Chillies - 2 medium
5. Sour Curd - 150-200 gm
6. Curry Leaves - a sprig
7. Salt - as required
8. Fenugreek seeds (Vendhayam) - 1tsp
9. Dry red chillies (round) - 2 or 3
10. Mustard seeds - 1 tsp
11. Coconut oil - 1tbsp

Method:
1. Peel the skin from potato and cut it into bite sized cubes. Transfer them to boiling water. Add turmeric powder & cook them for about 5-7 minutes or untill they are cooked. Grind coconut and green chillies with little water, to a paste. Add the paste onto the potatoes and mix well.
2. Cook the coconut paste for 3-5 mins for its raw smell to subside and the potatoes to finely blend with the gravy. Beat the sour curd to a flowing consistency and add to the dish. Add required amount of salt and stir well. Cook for about 2-3 mins in medium flame, until it gets slightly frothy and switch off the flame. Temper with mustard seeds, fenugreek seeds, red chillies & asafoetida powder in coconut oil.

Suggestions:

  • Other vegetables like raw banana or yam can be used in the place of potato.
  • Also some use lady's finger sauteed in oil, which I do not prefer as it makes the morkootan little gluey and liquidy.
  • Coconut oil gives an authentic Kerala touch to the dish for tempering. 
  • Any oil other than coconut oil can also be used for the tempering.
  • Attention is needed at the stage from adding sour curd. If it is cooked on high flame or for long time in medium flame or brought to a boil, the gravy tends to become curdled and it looses its consistency. It is always better to watchful and cook in medium or low flame after adding buttermilk. 
Tastes more delicious from the next day. It can be refrigerated and had for about 2-3 days.
Also acts as a perfect side-dish for dosa, idly etc.


Saturday, July 25, 2015

Araichu Vitta Sambar


     This is one of the richest and the most aromatic sambars that is made often at home. Soon after the mixie jar is opened after grinding the paste for this sambar, its fine aroma gives a feel that the sambar is already made :P We make this at home whenever guests come or for festivals in addition to making it in the normal days. The combo of this sambar vs Idly or dosa, topped with a drizzle of gingelly oil tastes so heavenly.. :) 
     Though the procedure looks so tedius, its just because of the many pics at different stages. The effort is worth the end product... So trust me and give it a try !!!

Prep Time: 10 mins || Cook Time: 35 mins || Serves: 4 ||  Category: Sambar/Rice Accompaniment

Ingredients:
1. Carrot - 1 Medium
2. Tomato - 1 Medium
3. Corriander seeds - 3 tsp
4. Dry red chillies - 2
5. Kadalai Paruppu (Bengal Gram) - 2tsp
6. Tamarind water - 200ml
7. Turmeric Powder - 1tsp
8. Hing (Asafoetida) - 2tsp
9. Grated coconut - 2-3 tbsp
10. Salt - as required
11. Toor Dal - 100gm cooked
12. Oil - 1tbsp
13. Mustard seeds - 2tsp
14. Corriander leaves - 1tbsp finely chopped

Method:
1. In about a tsp of oil, add corriander seeds and fry them till they are light brown. Similarly fry the red chillies and bengal gram. Cool them down for a while. Add turmeric powder to the tamarind water and bring to a boil.
2. Add sliced carrots to the boiling tamarind water and cook for about 5-7 mins or until they are three-fourth cooked. Then add the chopped tomatoes and cook for about 5 mins or until they turn mushy.
3. Grind the roasted and cooled corriander seeds, bengal gram, red chillies with coconut gratings and little water to a coarse paste. Add hing & required amount of salt to the boiling tamarind water.
4. Mash the cooked toor dal. Add the ground coconut paste to boiling tamarind water and mix well. Cook for about 2-3 mins.
5. Now add the mashed toor dal and mix well. cook for about 2-3 mins or until the sambar turns frothy at the top. Add chopped corriander leaves and switch off the flame. Temper with mustard seeds. 


Suggestions:

  • Number of red chillies can be altered according to one's spice level.
  • Aside carrot, other sturdy vegetables can also be substituted - potato, drumstick etc.
  • Adding tomato is optional.


Enjoy the sambar piping hot with rice & potato fry or with any tiffin item like idly or dosa with a drizzle of gingelly oil :) 


Tuesday, July 21, 2015

Milagu Jeeraga Rasam


     As a kid I used to hate this rasam, as it mostly shows up after I have had a fever or if someone had been ill :P as a dish which gradually introduces normal food to one's recovering tastebuds after 2 days of kanji or bread :( Nowadays I find this to be a very mild and comforting rasam to have during rainy days or after a day of heavy festive meals. One of the to-go factor for this rasam is that this doesn't need any vegetable in stock and can be easily made with the ever available ingredients pepper & jeera. Also we make this or any other rasam at home, alongside any molakootal or morkootan. Now, over to the preparation :)

Prep Time: 5 mins || Cook Time: 25 mins || Serves: 3 ||  Category: Rasam

Ingredients:

1. Tamarind water - 150 ml
2. Turmeric Powder - 1 tsp
3. Pepper powder - 3-4 tsp
4. Jeera (cumin) powder - 3-4 tsp
5. Salt - as required
6. Hing (asafoetida) - 2 tsp
7. Oil - 1tbsp
8. Mustard seeds - 1tsp
9. Cumin - 2tsp
10. Curry leaves - a sprig

Method:
1. Heat tamarind water in a pan. Add turmeric powder and bring it to boil.
2. Add pepper powder, cumin powder, hing and give a stir. Let it boil for about 5 mins. Add required amount of salt and water according to the tanginess of tamarind. Temper with jeera & curry leaves and keep covered.

Tastes heavenly with paruppu thogayal !!!  Can also be drunk as a soup.. 


Thursday, July 16, 2015

Vaazhaithandu Molakootal (Banana Stem Molakootal)


     This is yet another traditional dish from Kerala, one of the many variations that can be tried in Molakootal, by altering the vegetables. The key ingredient in this dish is Banana Stem (Vaazhaithandu). This makes a different meal from the routine chain of sambar, rasam and is very filling too. The inviting part of making molakootals is that there is no need to make a specific side-dish for this, as any pickle or thogayal will go well along with this :P
Obviously this combo makes cooking simplified for the day !!! 

Prep Time: 15 mins || Cook Time:  30 mins || Serves: 4 ||  Category: Rice Accompaniment

Ingredients:
1. Banana Stem - 1 medium sized
2. Grated coconut - 3tbsp
3. Cumin Seeds (jeera) - 3tsp
4. Dry red chillies - 2
5. Urad Dal - 1tsp
6. Salt - as required
7. Turmeric Powder
8. Toor Dal - 75 gms (cooked and mashed)
9. Asafoetida - 1tsp
10. Oil - 1tbsp
11. Mustard seeds - 2tsp
12. Curry Leaves - a sprig
13. Buttermilk - 1 cup (diluted)

Method:
1. Cut the banana stem into thin slices, make them into strips and finely chop them. Keep the chopped banana stem immersed in diluted buttermilk, until all the slices are done with chopping. Wash the chops and pressure cook in a pan for about 3 - 4 whistles, adding turmeric powder.
2. Grind coconut, jeera, urad dal & red chillies into a paste. Open the pressure pan once the steam resides and add the ground paste and mix well.
3. Let the ground paste and cooked banana stem boil for about 5 mins. Then add the mashed toor dal, hing, salt and mix well. Let it boil for 3-5 mins until everything blends to form a thick mass.
4. Switch off the flame and temper with mustard seeds and curry leaves.

Suggestions:
  • Soaking the banana stem in buttermilk, helps to avoid browning.
  • Urad dal has been added while grinding, in order to give a thick consistency & better binding. Adding urad dal is optional.
  • Can have this as a side-dish for rasam too.

    A wholesome meal is ready. Serve with any tangy thogayal or pickle :) 

Thursday, July 9, 2015

Lemon Rasam


     This is a very flavourful and easy rasam with all simple ingredients. It can be had with rice and also be drunk separately as a soup. After a day of heavy lunch or dinner, or after the usual lineup of sambars over the week, when I crave for something very light, I go on to make this lemon rasam. It makes an easy and light meal :)

Prep Time: 5 mins || Cook Time: 25 mins || Serves: 4 ||  Category: Rasam
Ingredients:
1. Ripe Tomato - 1
2. Green Chilly - 1 small
3. Ginger - a small piece
4. Turmeric powder - 1 tsp
5. Toor dal - 1 cup (cooked)
6. Pepper powder - 1/2 tsp
7. Mustard seeds - 1 tsp
8. Cumin seeds (jeera) - 2 tsp
9. Salt - as required
10. Oil - 2 tbsp
11. Coriander leaves - 1tbsp finely chopped
12. Lemon - 1 medium size
13. Hing (asafoetida) - 1tsp

Method:
1. Chop the tomatoes into cubes & slit the green chilly. In a pan, add 1tbsp of oil and add the slit green chillies, ginger (i used ginger paste as I didn't have whole ginger) and saute for a min. Then add the chopped tomatoes, hing and turmeric powder and give a quick stir. 
2. Once the tomatoes look sauteed, add enough water required for the rasam consistency. Let it boil for 3-5 mins. Then add the mashed toor dal, salt and pepper powder and stir well. Let it cook for 3-5 mins.
3. Once the rasam turns frothy on the top, switch off the flame. Temper with mustard seeds & cumin. Add finely chopped coriander leaves. Let it cool down for 10 mins. Then add the juice of 1 full lime or as per the desired tanginess. Give a stir.

Suggestions:

  • Can also use dry red chilly in the place of green chilly.
  • Do not add lime juice when the rasam is piping hot, as it may give a bitter taste.
  • Also do not heat the rasam too much, after it is refrigerated. As it contains lemon, reheating to a high temperature might send in a bitter taste.

Wednesday, July 8, 2015

Vaazhaithandu Poduthool (Banana stem poriyal)


     Banana stem is one of the edible parts of a banana plant, having rich nutritional value. Rich in fiber, potassium & helps prevent kidney stones. Has cooling properties and is beneficial to overall health. Back home, banana stem finds its place in our kitchen atleast once in a week, especially on the weekends, whenever I get back to Pondicherry, my hometown after a week long hectic work & stay at PG in Chennai.
     Weekends were usually a luxury for me, with my favourite dishes, long hours of sleep and boundless pampering & love :P Which obviously makes Monday mornings, very unwelcome :D to leave home back to work.
     During childhood, I used to watch with much surprise and fondness, how efficiently my grandma slices the banana stem and removes the excessive fibre after each slice. Lovely days !!! And she chops them down into unimaginably fine pieces !!!

Prep Time: 10 mins || Cook Time: 25 mins || Serves: 2 ||  Category: Side-dish

Ingredients:
1. Banana Stem (Vaazhaithandu) - 1 medium sized
2. Mustard seeds - 1 tsp
3. Split urad dal - 2 tsp
4. Turmeric powder - 1 tsp
5. Grated coconut - 2 tbsp
6. Green Chilly - 1 small
7. Salt - as required
8. Hing (asafoetida) - 2tsp
9. Coconut oil - 2 tbsp
10. Curry Leaves - 1 sprig

Method:
1. Wash the banana stem and cut it into thin slices, immersing the slices in buttermilk mixed water, to avoid browing of the vegetable. Cut the slices into thin strips and chop them finely and keep the chops immersed in the buttermilk water.
2. Heat oil in a pan and add mustard seeds. Once they splutter, add urad dal and reduce the flame. Add turmeric powder followed by a pinch of asafoetida. Drain the chopped banana stem from buttermilk and add it to the pan. Cook covered for about 10 mins with intermediate stirring.
3. Blend the coconut gratings with a green chilly and add this to banana stem and cook for 3-4 mins. (The blending step can be skipped and the coconut grating and chopped green chillies can be added separately to the vegetable). Add required amount of salt and cook for 5 mins. Lastly add some coarsely chopped curry leaves. Cook for a min and switch off the flame.


Suggestions:

  • Dry red chillies can also be added instead of green chillies.
  • If you want the curry to be dry, in order to remove the moisture from banana stem, powder 2 tsp of roasted parboiled rice (idly rice) with 1 red chilly and add it after adding coconut. If following this step, accordingly reduce/avoid the quantity of green chillies to balance the hotness.


Tuesday, July 7, 2015

Mango Pickle

     
     Raw Mango pickle is the most easiest pickle to make. Hooked to its tangy taste, most quantity of the mango will be consumed by me even as it is being cut :D  Every summer, the pickle season kick starts with this basic mango pickle, followed by lime, gooseberry etc. There are two variants we try at home with this raw mango. One is the usual finely cut basic pickle here, and the other one being a roughly chopped version, which is sauteed with gingelly oil in a pan. Though the basic ingredient for the pickles are same, they have a distinct taste :)
     Both are heavenly to be had with curd rice :) :) 

Prep Time: 10 mins || Cook Time: 5 mins || Yields: 150gm ||  Category: Pickle
Ingredients:
1. Raw Mango - 1 Medium sized
2. Gingelly oil - 2 tbsp
3. Mustard seeds - 2 tsp
4. Red Chilly Powder - 2tbsp
5. Turmeric Powder - 2tsp
6. Hing(Asafoetida) - 2tsp
7. Mustard seeds powder - 1 tsp
8. Fenugreek powder - 1 tsp
9. Salt - 4tsp

Method:
1. Wash and pat the mango dry in a clean kitchen towel. Finely chop the mango and transfer it to a mixing bowl.
2. In a pan, heat gingelly oil and add mustard seeds. Once they splutter, add it to the chopped mango. In hot oil, add chilly powder, turmeric powder, hing and switch off the flame. Add fenugreek powder. Add this spice mixture to the finely cut mango, followed by salt, mustard seeds powder and some more hing. Mix well and keep covered.

Suggestions:

  • Adding mustard seeds powder is optional.
  • Adding hing in two stages - in oil as well as in raw form gives more flavour to the pickle.
  • Though any oil can be used, gingelly oil gives a good aroma and taste.
  • Can be consumed soon after it is made.
  • Tastes more yummy from the next day, with all the flavours absorbed.
  • Keeps well for 8-10 days when refrigerated.