Monday, December 31, 2018

Chakka Varatti Recipe


So !? One of my New Year resolutions for 2019 is to bring my blog out of a year long hibernation. The recipe that is going to revive my blog out of its dormancy is a traditional sweet of Kerala - "Chakka Varatti" which in the human readable language is simply "Jackfruit Jam" 
Though I had wanted to make this and post it in my blog from a long long time, I couldn't do so reasonably sooner, because -  we do not find good quality jackfruits in the USA & even if we do, I am not adept in opening a jackfruit like the way it is shown in a song in the Pithamagan movie :P

As a workaround, when I went to India last time, I tookup the project, yesss you heard me right !  'The Project' of making Jackfruit Jam, so called Chakka Varatti. I remember those good old days when my grandma was hale and healthy and would make this recipe during most of the summer holidays when my cousins used to visit us at Pondicherry. (Yes of course, I found a way to bring my hometown into the blog) She used to put a spoon of Chakka Varatti on our palm and we used happily lick it clean !!

Wish you all a very happy, healthy, prosperous and successful New Year 2019 !!

Over to the recipe now !   

Prep Time: 45 mins || Cook Time: 45 mins || Category: Jams/Spreads/Sweets || Serves: Depends on how much one eats !

Ingredients:
1. Jackfruit flesh - 70 to 80 pieces
2. Jaggery syrup - equal amount as that of ground jackfruit flesh.
3. Ghee - 4 to 6 tbsp
4. Cardamom powder - 2 tsp 


Method:
1. Smear gingelly oil on the palm and cut open the whole jackfruit to separate the jackfruit flesh individually & de-seed them. Chop the jackfruit flesh into fine pieces (if not grinding) / into coarse pieces (if grinding).


2. Pressure cook the fruit pieces for 2-3 whistles, sprinkling some water just enough for it to be cooked. Allow it to cool completely and then grind it to a fine paste.
3. Meanwhile make sugar syrup by adding water just to immerse the jaggery. Filter the jaggery syrup to remove impurities. let the syrup come to 1 string consistency.
4. Add in the jackfruit paste to the jaggery syrup and mix well stirring constantly.
5. Keep stirring till it reduces in volume, starts to bubble and become glazy. Add a spoon of ghee periodically and keep stirring till it is cooked completely and forms a thick sticky mass. Add cardamom powder & switch off the flame after mixing well.


Suggestions:

  •  Use dark colored jaggery to get the perfect color.
  •  Adding cardamom is optional.
  • In the traditional method, the fruit flesh is chopped to fine pieces and added directly to the jaggery syrup and mashed well while stirring.
  • Getting a few small pieces of the fruit here and there gives a good texture to the jam.
  • Add ghee generously till the jam glazes.
  • Tastes more delicious after 1-2 days after the jam is made.
  • Keeps well in the room temperature for about a week. Use a clean and dry spoon when handling.
  • Can be frozen or refrigerated & used in Payasam / Ilai Adai etc.


Friday, December 15, 2017

Avocado Spread Recipe


     Back to Blogging !! With a simple recipe. We used to buy Avocado occasionally. I did not know to make any other variation than a simple guacamole for a burrito or an avocado basil pesto for pasta which is even more rarely made at home. 

     When we went to Michigan this summer to a relatives house, I got to taste this super-easy and yummy variation along with multigrain and nuts bread :) yummmmm.   Once we came back from the trip, I bought 2 avocados to try this out. One thing I love the most is that the avocado spread is a no-cook recipe.  Definitely a very cool and filling option for a breakfast !!

Okay let us go on to the recipe.....

Prep Time: 10 mins || Cook Time: N/A || Category: Spreads/Dips || Serves: 3

Ingredients:
1. Avocado - 2
2. Tomato - finely chopped (1 tbsp)
3. Onion -  finely chopped (1 tbsp)
4. Coriander leaves - finely chopped
5. Lemon - 1 small (based on need)
6. Salt - as required

Method:
1. Cut the avocado into half vertically. Deseed and scoop out the avocado flesh with a spoon into a bowl. Mash it well. 
2. To the avocado pulp, add finely chopped onion, tomato, coriander leaves.
3. Add required amount of salt and lemon juice and mix well for the ingredients to blend.

Suggestions:

  • Selecting ripe avocados or ripening the avocados properly is the key to a tasty avocado spread. Buy green avocados with multiple brown or black spots in them. Keep them in the countertop near stove for 2 or 3 days. Check periodically for ripening. Once ripe, they will achieve a uniform brown color and will look slightly firm when held in hand but will feel soft when slightly pressed.
  • Give wings to your imagination and add italian seasoning, herbs, chopped basil etc for additional flavor. 

Tastes very good with a simple bread toast / french bread. Also goes well with chappathi/roti or as a dip for a variety of chips.

Thursday, July 13, 2017

Mixed Vegetable Subji Recipe /Mixed Vegetable Subzi

     Occasionally we buy some subzi from a caterer friend, when we have a busy weekend and need something for a quick fix side-dish to pair up with the store-bought wheat tortilla. I got the urge to try this mixed vegetable subzi recipe from one of our weekend-subzi-orders from the caterer. For me, the tough and tedious part was in chopping the vegetables. Other than portion, I feel this is an easy wholesome and also a colourfully appealing dish. 
Also a great way to make use of any of the left out vegetables in your fridge before your vegetable shopping for the week !!

Prep Time: 20 mins || Cook Time: 35 - 40 mins || Serves: 8 || Category: Side-Dish for Roti/Chappathi

Ingredients:
1. Cauliflower florets - 2 cups
2. Carrot - 1 big
3. Beans - 10 to 15
4. Cabbage - 1 cup
5. Peas - 1/2 cup
6. Potato - 1 medium
7. Turmeric powder - 2 tsp
8. Cashew - 8 to 10
9. Green chili - 2
10. Tomato - 1 big
11. Cumin seeds - 2 tsp
12. Onion - 1 big
13. Hing - 3 to 4 tsp
14. Ginger garlic paste - 1/2 tbsp
15. Kashmiri chili powder - 1 tsp
16. Coriander powder - 2 tsp
17. Garam masala - 1 tsp
18. Oil - 3-4 tbsp
19. Salt - as required
20. Thick curd - 2 tbsp (optional)
21. Fresh cream - 2 tbsp
22. Kasoori methi - 2 tsp
23. Coriander leaves 

Method:
1. Peel and wash the vegetables - carrot, beans, peas, cabbage, potato as required. Parboil the cauliflower florets with a pinch of turmeric powder, salt and filter it.
2. Heat some oil in a pan and saute cauliflower, carrot, beans, peas, cabbage, potato for 15 mins or till they are more than half cooked. Keep aside in a plate for cooling.Heat some oil or ghee in the same pan and fry cashews (not shown in the pics).
3. Add 2 tbsp of oil in a pan and heat it. Add cumin seeds, onion, slit green chili. turmeric powder 1 tsp, hing and saute for 3-4 mins. Then add tomato, ginger garlic paste and saute till the raw smell of garlic fades. 
4. When the tomato has blended well with the onions, add kashmiri chili powder, coriander powder, garam masala, salt and mix well. 
5.  Add curd and mix well in low flame. The masala becomes light in colour.
6. Put the sauted vegetables, cashew and lastly add fresh cream, kasoori methi, salt and coriander leaves.


Suggestions:
  • Adding fresh cream or thick curd is optional.
  • Throw in the vegetables of your choice.


Friday, March 31, 2017

Paneer Spring Onion Masala Recipe

     Life has become too busy and tiring for me, even being a stay-at-home-mom, or perhaps should I rephrase it like this - life is more busy and strenuous for stay-at-home-moms only !!!??!! Since a couple of weekends, we have started buying 3 or 4 subzis from a known caterer for using in the weekdays with roti etc. A splendid time and effort saver for me. Thanks to that somebody who invented food catering phenomenon :P
     This routine of roti with subzi has led to a quest of finding some new and easy to make dishes to add to the subzi list, so that I can make the new ones whenever the taste buds feel tired of having the usual dhal makhani or the kadai paneer or the aloo gobi :D
     I am usually so fond of this spring onion that I go and buy it without any thought process of how I am going to end up using it !!  Spring onions available in India are so tender, flavourful and yummy. I am missing them a lot :( 
   This gravy is one good recipe which brightly shows the flavour of spring onion, my favourite.

Prep Time: 10 mins || Cook Time: 40 mins || Serves: 4 || Category: Gravy/Side-dish for Roti/Chappathi etc

Ingredients:

1. Paneer - 20 to 25 cubes
2. Spring onion - 2 bunches (each had 5 bulbs)
3. Cardamom - 3
4. Cinnamon - 1 stick
5. Cloves - 3 or 4
6. Onion - 1 medium sized
7. Tomato - 1 medium sized
8. Ginger - 1 tbsp (finely chopped)
9. Turmeric powder - 1 tsp
10. Chili powder - 2 tsp 
11.Coriander powder - 2 tsp
12. Cashews - 10 to 15 whole cashews
13. Kasoori Methi - 1 tbsp
14. Coriander leaves (optional)
15. Oil - 3 to 5 tbsp

Method:
1. Keep the paneer cubes immersed in warm water for 10 mins. In a pan, add 2 to 3 tbsp of oil and heat it. Toss the green part of the spring onion cut into inch long strips and the diced paneer for 2-3 mins. Transfer them to a plate and then add 1tbsp of oil to the pan and heat it. Add cardamom, cinnamon, clove and fry till their aroma arise. Then add finely chopped onion and the white part of the spring onion and saute for 3-5 mins.
 2. Then add finely chopped ginger, tomato and saute for 2 mins. 
3. Then add turmeric powder, chili powder, coriander powder, salt and mix well. Sprinkle some water and cook well. Soak 10-15 cashews for 20 mins and then grind it into a paste with very little water. 
4. After the gravy and the masala powders have got cooked, add the cashew paste and mix well. Cook for about 5 mins until the raw smell of cashew paste goes off. After the gravy has cooked well, the oil will separate on top. (for me it didn't, as I added very less oil). Now add crushed kasoori methi and cook for a min. 
5. Finally add the sauteed paneer and spring onion. Mix well, adjust salt and if needed, add a little water to get the required consistency of gravy. Switch off the flame after a min and then garnish with coriander leaves.

Suggestions:

  • If adding ginger garlic paste, keep stirring to avoid the paste getting burnt and stuck to the vessel.
  • After adding cashew paste, the gravy will splutter when boiling. Keep a long laddle for stirring. 
  • Add 2 spoons of fresh cream to give a creamy texture and consistency to the gravy. 

Tuesday, February 28, 2017

Vaazhaipoo Thirattu Recipe

      Banana Flower (Vaazhaipoo) is one of my favorite vegetables. I tried this recipe for the very first time, when my mom was here during winter. Then she made this recipe again, along with some other gravies and side-dishes and refrigerated for a week's use, when she started to India. Abhinav was 3 months old then :P
     The dishes she made for the week were very helpful, as we had the ad-hoc kitchen inspection also going on in the apartment. During which the kitchen is expected to be kept spotlessly clean and with no pots on the stovetop ?!!!!! (A question used to run in the back of my mind - Are we not supposed to cook daily ?? How can we have a stovetop without pots on it  that too at anytime unknown as the inspection is ad-hoc !!)
     We got this recipe from a TV show. When the quantity of the useable part in the banana flower is less, this dish easily adds volume and makes it a nice rich gravy. Though it is time consuming, it is worth the effort. Stays good for 3 to 4 days when refrigerated.
     This is a no tamarind, no coconut dish and yet thick and richly flavourful 😇
Featured in the main pic are the vegetables that I made with clay 😍
Prep Time: 25 mins || Cook Time: 30 mins || Serves: 6 || Category: Gravy for rice / Side-dish


Ingredients:

1. Black sesame seeds - 2 tsp
2. Groundnut - 4 tsp
3. Pepper - 2 tsp
4. Ginger - a small piece
5. Curry leaves - 2 sprigs
6. Curd - 2 tbsp
7. Banana flower - 1
8. Salt - as required
9. Mustard seeds - 2 tsp
10. Dry red chilies - 4
11, Onion shallots - 10 to 12
12. tomato - 1 big
13. Turmeric powder - 1 tsp
14. Gingelly oil - 2 tbsp
15. Hing - 2 tsp
16. Cumin seeds - 1 tsp

Method:

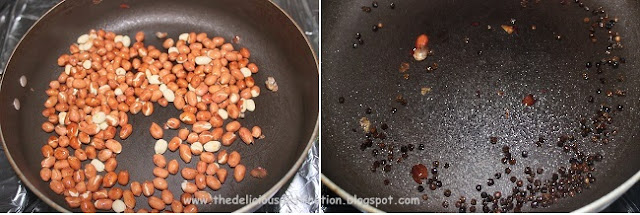
1. Heat a tsp of oil in a pan and separately roast the following items - sesame seeds, groundnuts, pepper, ginger, curry leaves. 
2. Roast the items carefully with even browning till a nice aroma comes.
 3. Cool the ingredients and grind as a fine paste. Add water to curd and dilute it to buttermilk consistency. Chop banana flower (after removing the cetermost long stalk and the white film from each petal) and soak in buttermilk. (not shown in the pics. will update in future in a special post on how to cut Banana Flower)
4. In a pan, heat oil and add mustard seeds, allowing it to splutter. Then add cumin seeds, red chilis, onion shallots and saute for 3-4 mins. Then add chopped tomato and turmeric powder. Saute well until the shallots turn golden brown and the tomatoes are cooked well.
5. Then add the banana flower strained from buttermilk and cook for 5-8 mins. Add salt and stir well. Keep covered for 3-4 mins in medium flame.
6. Then add the ground paste and cook for 2-3 mins. Add sufficient water to get the desired consistency and allow it to boil. Finally add fresh curry leaves and coriander leaves. Lastly drizzle some gingelly oil on top and switch off the flame. 

Suggestions:

  • Using gignelly oil adds a specific taste to the recipe. 
  • Try to use onion shallots and not the regular onion.
  • Keeping refrigerated, the dish stays good for atleast 3-4 days. 


Tastes good with hot rice and a drizzle of gingelly oil on top... Also pairs well with curd rice as side dish. 

Saturday, January 28, 2017

Tangy Tomato Gravy Recipe


     Nooooooo more excuses for not posting !!!!
Thanks for everyone who had been checking my blog for new posts and definitely a very big Sorry for disappointing you without any post since a month :(
Recently, one of my relatives asked me " Aren't there any new posts?  I had been seeing your blog often to only find the age old butternut squash kootu recipe" Thats when I thought "Ohh yeah... I had a blog and was almost active with it.. How did I forget all about it !!" At that very moment, I promised myself - hereafter atleast 2 posts a week no matter how busy I become. Dot.

     My little bunny Abhinav is back home after his flu shot at the pediatrician's and is so tired after a big round of cry and now, is fast asleep.. ZZZZzzzz... :P giving his mommy some time to catch up with the blogging..

My MIL often makes this simple tangy side-dish with tomatoes for phulka.. we are all hooked to it. So, here it comes for the blog !!


Prep Time: 5 mins || Cook Time: 25 mins || Serves: 3 || Category: Side-dish for phulka/chappathi 

Ingredients:
1. Gingelly Oil - 3 tbsp
2. Cumin seeds - 2 tsp
3. Tomato - 3 or 4
4. Turmeric powder - a pinch
5. Salt - as required
6. Hing - 1 tsp
7. Green chili - 2
8. Sambar powder - 1 tbsp
9. Coriander leaves - for garnishing

Method:

1. In a pan heat gingelly oil and splutter the cumin seeds. Add finely chopped tomatoes, turmeric powder and salt and mix well.
 2. Keep covered and cook for about 10 mins. Need not add any extra water. Let the tomatoes get cooked in the tomato juice itself. Add sambar powder and mix well. Cook covered for 10 -15 mins with intermediate stirring. Add hing and green chili (if required for additional flavour).
 3. Once the gravy thickens and the oil slightly floats on top, garnish with finely chopped coriander leaves and switch off the flame. 

Those cute tiny little tomatoes and the red chili in the pic are made out of clay. I made them using the clay we got from Siva Vishnu Temple during Ganesh Chathurthi.. It was a proud display in the Golu :P  And now they are the props in food photography !!!

Enjoy this simply tangy side-dish for your phulkas... Yummyyy !!!

Friday, December 30, 2016

Kezhvaragu Koozh Recipe / Ragi Koozh Recipe


     I knew this recipe is going be a super lengthy post and that I would not be able to draft it in a single day. I started with the post when I was in Pondicherry during November for a short vacation. I was so greedy to complete this on the same day, as I wanted it to be published from my hometown, this being a special post for me, as it is the first one to feature in my blog under the category - Baby Food. But somehow I managed to edit the pictures atleast, just before I started to the post-cyclone-hit-Chennai 😀😀  


     I came across this Koozh atleast 2 decades back, when my cousin Aravind was a baby. I still have a good memory of the Koozh which my mami prepares for him, its aroma, its consistency !! (may sound unreal, but amazingly, I remember). He used to be a chubby kid. The reason for which may be due to many factors, but it somehow got into my mind that goodness of the kezhvaragu koozh played an important part in him being a chubby plumpy bubbly kid. So, I wanted to give this  iron rich, nutritious baby food to my little one Abhinav as well 😍

     As is the post being jumbo, overloaded with a lot of my memories penned down, so is the process of making ragi koozh powder too !!! It took almost a week (without sufficient sunlight to dry the ragi milk) and a lot of hardwork from 3 people - my grandma, my mom and me tooo...(atleast for taking the pics :P)

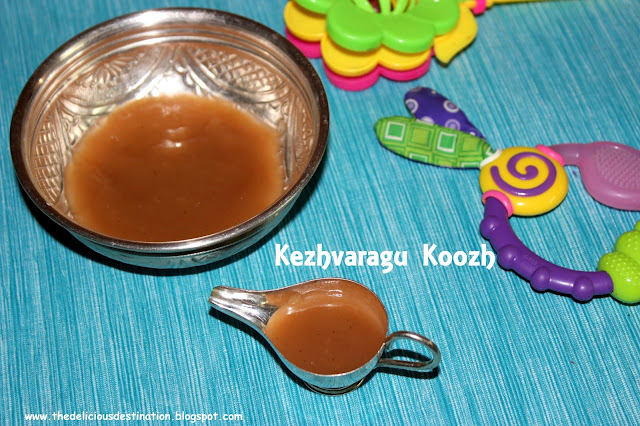
     The silver paaladai (the small vessel with handle in the pic) and another bowl was presented by my husband's periamma to Abhinav :) Many a thanks to Kalyani periamma for this valuable gift with a lot more utility :)

     Using a paaladai and giving medicine/food to babies is a very special skill that one can attain only by experience. I am still skeptical if I will be able to master that art, as I find it so fearsome to control a wriggling, squeaking child put on the lap and forcefully inject the food/medicine through the corner of its mouth, with the paaladai device tilted at an expertised angle, while the baby is crying so badly making gurgling sounds in gulping the liquid and paralelly crying..., . Omg... Uffff !!!! Hats off to MIL... I cant even stand beside and watch her give something to Abhinav. Yess I get tensed due to fear and ask her to stop after just 2 trials. I cant stand to watch him cry so hardly :( 

Okay okay, now over to the process of making the ragi powder :)

Prep Time: 4-5 days || Cook Time: 5 mins || Serves : 1 || Category: Baby Food

Ingredients:
1. Ragi - 1 kg
2. Sugar - 1/2 tsp (optional)
3. Ghee - 1/2 tsp (optional)

Method:
1. Soak ragi for about 36 hours. Rinse and change the soaking water once or twice.
(I will update with a pic of soaked ragi later). Grind the soaked ragi in a grinder with some of the soaked water. It took 45 mins to 1 hour for me.
2. Strain the ground ragi in a strainer with moderately big holes. It is okay if some of the ragi's skin escapes the holes.We are going to double filter this extract anyway.
3. Squeeze the ragi skin chunks for any more extract and then discard the squeezed dry mass of ragi. Again filter the extracted ragi milk in a strainer with more fine holes. Leave the ragi milk extract in a wide vessel covered with a lid, for overnight for fermenting. Mine took about 20 hours to settle and ferment.

4. After overnight, the thick ragi milk would have deposited at the bottom leaving a clear liquid with some froth on the top of the container. Discard the clear liquid without disturbing the settled ragi milk.
5. Now pour this ragi extract slowly over a fine mesh cloth tied around a vessel and knotted at the neck, to prevent the cloth from falling into the vessel due to ragi extract's weight. This is done to separate water, if any existing in the extract. After 2 to 3 hours, water from the ragi extract would have got filtered through the cloth, leaving a more thick paste of ragi extract.
6. Now untie the cloth from the vessel, while carefully holding it not to fall inside and touch the filtered water. Fold the cloth from all the sides and slightly squeeze the cloth with ragi extract to filter some more water. Then leave some room on top and tie the cloth into a small bag and hang it from any hook or surface, placing a vessel right beneath to collect the dripping water. 

7. After about 8-10 hours or overnight hanging, there would be no more water in the ragi extract and the ragi mass would have solidified slightly. Now carefully remove the bag and untie it. Break the ragi mass into small chunks, with a heavy spoon or laddle.
8. Give some time for the chunks to dry in sunlight and then break them down further. After drying under sunlight for 8-10 hours, finely powder the dried ragi extract in a mixi. Store in an air-tight container.
9. To make the koozh for 1 serving, take a table spoon of the ragi powder and add some water. Mix it thoroughly with a spoon and then after the ragi powder has mixed uniformly, add some more water and stir well. (I bought this small anodized vessel,  during my stay at Chennai, for the exclusive purpose of making Koozh for Abhinav :) as it is very easy with these type of vessels to cook as well as to clean.)
 10. Keep the vessel on stovetop in medium flame and keep stirring. 
11. After about 3 -5 mins, it would start thickening and boiling well with small bubbles forming and breaking. At this time give a final stir and switch off the flame. If you want a more thicker consistency, continue for 2 more mins and then switch off. If desired, a spoon of ghee and some sugar can be added when the koozh is warm.


Suggestions:

  • Organic ragi can also be used. Can also try multi grains with various nuts.
  • For toddlers, ragi can be directly powdered in mill along with cashews, badam, cardamom etc. Need not follow this ragi milk extract method.
  • The traditional method of making the koozh powder follows, sun drying the ragi milk extract (after step 6). But as there was not enough sunlight during November, I had to cut short that to indoor drying process.
  • Sundried Koozh powder lasts longer. 
   So painstakingly prepared ragi powder is definitely worth all the efforts for it nutritiousness.    
   Wish you all a very happy new year 2017 :)