Friday, March 31, 2017

Paneer Spring Onion Masala Recipe

     Life has become too busy and tiring for me, even being a stay-at-home-mom, or perhaps should I rephrase it like this - life is more busy and strenuous for stay-at-home-moms only !!!??!! Since a couple of weekends, we have started buying 3 or 4 subzis from a known caterer for using in the weekdays with roti etc. A splendid time and effort saver for me. Thanks to that somebody who invented food catering phenomenon :P
     This routine of roti with subzi has led to a quest of finding some new and easy to make dishes to add to the subzi list, so that I can make the new ones whenever the taste buds feel tired of having the usual dhal makhani or the kadai paneer or the aloo gobi :D
     I am usually so fond of this spring onion that I go and buy it without any thought process of how I am going to end up using it !!  Spring onions available in India are so tender, flavourful and yummy. I am missing them a lot :( 
   This gravy is one good recipe which brightly shows the flavour of spring onion, my favourite.

Prep Time: 10 mins || Cook Time: 40 mins || Serves: 4 || Category: Gravy/Side-dish for Roti/Chappathi etc

Ingredients:

1. Paneer - 20 to 25 cubes
2. Spring onion - 2 bunches (each had 5 bulbs)
3. Cardamom - 3
4. Cinnamon - 1 stick
5. Cloves - 3 or 4
6. Onion - 1 medium sized
7. Tomato - 1 medium sized
8. Ginger - 1 tbsp (finely chopped)
9. Turmeric powder - 1 tsp
10. Chili powder - 2 tsp 
11.Coriander powder - 2 tsp
12. Cashews - 10 to 15 whole cashews
13. Kasoori Methi - 1 tbsp
14. Coriander leaves (optional)
15. Oil - 3 to 5 tbsp

Method:
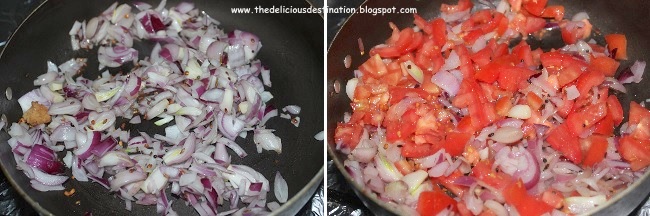
1. Keep the paneer cubes immersed in warm water for 10 mins. In a pan, add 2 to 3 tbsp of oil and heat it. Toss the green part of the spring onion cut into inch long strips and the diced paneer for 2-3 mins. Transfer them to a plate and then add 1tbsp of oil to the pan and heat it. Add cardamom, cinnamon, clove and fry till their aroma arise. Then add finely chopped onion and the white part of the spring onion and saute for 3-5 mins.
 2. Then add finely chopped ginger, tomato and saute for 2 mins. 
3. Then add turmeric powder, chili powder, coriander powder, salt and mix well. Sprinkle some water and cook well. Soak 10-15 cashews for 20 mins and then grind it into a paste with very little water. 
4. After the gravy and the masala powders have got cooked, add the cashew paste and mix well. Cook for about 5 mins until the raw smell of cashew paste goes off. After the gravy has cooked well, the oil will separate on top. (for me it didn't, as I added very less oil). Now add crushed kasoori methi and cook for a min. 
5. Finally add the sauteed paneer and spring onion. Mix well, adjust salt and if needed, add a little water to get the required consistency of gravy. Switch off the flame after a min and then garnish with coriander leaves.

Suggestions:

  • If adding ginger garlic paste, keep stirring to avoid the paste getting burnt and stuck to the vessel.
  • After adding cashew paste, the gravy will splutter when boiling. Keep a long laddle for stirring. 
  • Add 2 spoons of fresh cream to give a creamy texture and consistency to the gravy. 

Tuesday, February 28, 2017

Vaazhaipoo Thirattu Recipe

      Banana Flower (Vaazhaipoo) is one of my favorite vegetables. I tried this recipe for the very first time, when my mom was here during winter. Then she made this recipe again, along with some other gravies and side-dishes and refrigerated for a week's use, when she started to India. Abhinav was 3 months old then :P
     The dishes she made for the week were very helpful, as we had the ad-hoc kitchen inspection also going on in the apartment. During which the kitchen is expected to be kept spotlessly clean and with no pots on the stovetop ?!!!!! (A question used to run in the back of my mind - Are we not supposed to cook daily ?? How can we have a stovetop without pots on it  that too at anytime unknown as the inspection is ad-hoc !!)
     We got this recipe from a TV show. When the quantity of the useable part in the banana flower is less, this dish easily adds volume and makes it a nice rich gravy. Though it is time consuming, it is worth the effort. Stays good for 3 to 4 days when refrigerated.
     This is a no tamarind, no coconut dish and yet thick and richly flavourful 😇
Featured in the main pic are the vegetables that I made with clay 😍
Prep Time: 25 mins || Cook Time: 30 mins || Serves: 6 || Category: Gravy for rice / Side-dish


Ingredients:

1. Black sesame seeds - 2 tsp
2. Groundnut - 4 tsp
3. Pepper - 2 tsp
4. Ginger - a small piece
5. Curry leaves - 2 sprigs
6. Curd - 2 tbsp
7. Banana flower - 1
8. Salt - as required
9. Mustard seeds - 2 tsp
10. Dry red chilies - 4
11, Onion shallots - 10 to 12
12. tomato - 1 big
13. Turmeric powder - 1 tsp
14. Gingelly oil - 2 tbsp
15. Hing - 2 tsp
16. Cumin seeds - 1 tsp

Method:

1. Heat a tsp of oil in a pan and separately roast the following items - sesame seeds, groundnuts, pepper, ginger, curry leaves. 
2. Roast the items carefully with even browning till a nice aroma comes.
 3. Cool the ingredients and grind as a fine paste. Add water to curd and dilute it to buttermilk consistency. Chop banana flower (after removing the cetermost long stalk and the white film from each petal) and soak in buttermilk. (not shown in the pics. will update in future in a special post on how to cut Banana Flower)
4. In a pan, heat oil and add mustard seeds, allowing it to splutter. Then add cumin seeds, red chilis, onion shallots and saute for 3-4 mins. Then add chopped tomato and turmeric powder. Saute well until the shallots turn golden brown and the tomatoes are cooked well.
5. Then add the banana flower strained from buttermilk and cook for 5-8 mins. Add salt and stir well. Keep covered for 3-4 mins in medium flame.
6. Then add the ground paste and cook for 2-3 mins. Add sufficient water to get the desired consistency and allow it to boil. Finally add fresh curry leaves and coriander leaves. Lastly drizzle some gingelly oil on top and switch off the flame. 

Suggestions:

  • Using gignelly oil adds a specific taste to the recipe. 
  • Try to use onion shallots and not the regular onion.
  • Keeping refrigerated, the dish stays good for atleast 3-4 days. 


Tastes good with hot rice and a drizzle of gingelly oil on top... Also pairs well with curd rice as side dish. 

Saturday, January 28, 2017

Tangy Tomato Gravy Recipe


     Nooooooo more excuses for not posting !!!!
Thanks for everyone who had been checking my blog for new posts and definitely a very big Sorry for disappointing you without any post since a month :(
Recently, one of my relatives asked me " Aren't there any new posts?  I had been seeing your blog often to only find the age old butternut squash kootu recipe" Thats when I thought "Ohh yeah... I had a blog and was almost active with it.. How did I forget all about it !!" At that very moment, I promised myself - hereafter atleast 2 posts a week no matter how busy I become. Dot.

     My little bunny Abhinav is back home after his flu shot at the pediatrician's and is so tired after a big round of cry and now, is fast asleep.. ZZZZzzzz... :P giving his mommy some time to catch up with the blogging..

My MIL often makes this simple tangy side-dish with tomatoes for phulka.. we are all hooked to it. So, here it comes for the blog !!


Prep Time: 5 mins || Cook Time: 25 mins || Serves: 3 || Category: Side-dish for phulka/chappathi 

Ingredients:
1. Gingelly Oil - 3 tbsp
2. Cumin seeds - 2 tsp
3. Tomato - 3 or 4
4. Turmeric powder - a pinch
5. Salt - as required
6. Hing - 1 tsp
7. Green chili - 2
8. Sambar powder - 1 tbsp
9. Coriander leaves - for garnishing

Method:

1. In a pan heat gingelly oil and splutter the cumin seeds. Add finely chopped tomatoes, turmeric powder and salt and mix well.
 2. Keep covered and cook for about 10 mins. Need not add any extra water. Let the tomatoes get cooked in the tomato juice itself. Add sambar powder and mix well. Cook covered for 10 -15 mins with intermediate stirring. Add hing and green chili (if required for additional flavour).
 3. Once the gravy thickens and the oil slightly floats on top, garnish with finely chopped coriander leaves and switch off the flame. 

Those cute tiny little tomatoes and the red chili in the pic are made out of clay. I made them using the clay we got from Siva Vishnu Temple during Ganesh Chathurthi.. It was a proud display in the Golu :P  And now they are the props in food photography !!!

Enjoy this simply tangy side-dish for your phulkas... Yummyyy !!!

Friday, December 30, 2016

Kezhvaragu Koozh Recipe / Ragi Koozh Recipe


     I knew this recipe is going be a super lengthy post and that I would not be able to draft it in a single day. I started with the post when I was in Pondicherry during November for a short vacation. I was so greedy to complete this on the same day, as I wanted it to be published from my hometown, this being a special post for me, as it is the first one to feature in my blog under the category - Baby Food. But somehow I managed to edit the pictures atleast, just before I started to the post-cyclone-hit-Chennai 😀😀  


     I came across this Koozh atleast 2 decades back, when my cousin Aravind was a baby. I still have a good memory of the Koozh which my mami prepares for him, its aroma, its consistency !! (may sound unreal, but amazingly, I remember). He used to be a chubby kid. The reason for which may be due to many factors, but it somehow got into my mind that goodness of the kezhvaragu koozh played an important part in him being a chubby plumpy bubbly kid. So, I wanted to give this  iron rich, nutritious baby food to my little one Abhinav as well 😍

     As is the post being jumbo, overloaded with a lot of my memories penned down, so is the process of making ragi koozh powder too !!! It took almost a week (without sufficient sunlight to dry the ragi milk) and a lot of hardwork from 3 people - my grandma, my mom and me tooo...(atleast for taking the pics :P)

     The silver paaladai (the small vessel with handle in the pic) and another bowl was presented by my husband's periamma to Abhinav :) Many a thanks to Kalyani periamma for this valuable gift with a lot more utility :)

     Using a paaladai and giving medicine/food to babies is a very special skill that one can attain only by experience. I am still skeptical if I will be able to master that art, as I find it so fearsome to control a wriggling, squeaking child put on the lap and forcefully inject the food/medicine through the corner of its mouth, with the paaladai device tilted at an expertised angle, while the baby is crying so badly making gurgling sounds in gulping the liquid and paralelly crying..., . Omg... Uffff !!!! Hats off to MIL... I cant even stand beside and watch her give something to Abhinav. Yess I get tensed due to fear and ask her to stop after just 2 trials. I cant stand to watch him cry so hardly :( 

Okay okay, now over to the process of making the ragi powder :)

Prep Time: 4-5 days || Cook Time: 5 mins || Serves : 1 || Category: Baby Food

Ingredients:
1. Ragi - 1 kg
2. Sugar - 1/2 tsp (optional)
3. Ghee - 1/2 tsp (optional)

Method:
1. Soak ragi for about 36 hours. Rinse and change the soaking water once or twice.
(I will update with a pic of soaked ragi later). Grind the soaked ragi in a grinder with some of the soaked water. It took 45 mins to 1 hour for me.
2. Strain the ground ragi in a strainer with moderately big holes. It is okay if some of the ragi's skin escapes the holes.We are going to double filter this extract anyway.
3. Squeeze the ragi skin chunks for any more extract and then discard the squeezed dry mass of ragi. Again filter the extracted ragi milk in a strainer with more fine holes. Leave the ragi milk extract in a wide vessel covered with a lid, for overnight for fermenting. Mine took about 20 hours to settle and ferment.

4. After overnight, the thick ragi milk would have deposited at the bottom leaving a clear liquid with some froth on the top of the container. Discard the clear liquid without disturbing the settled ragi milk.
5. Now pour this ragi extract slowly over a fine mesh cloth tied around a vessel and knotted at the neck, to prevent the cloth from falling into the vessel due to ragi extract's weight. This is done to separate water, if any existing in the extract. After 2 to 3 hours, water from the ragi extract would have got filtered through the cloth, leaving a more thick paste of ragi extract.
6. Now untie the cloth from the vessel, while carefully holding it not to fall inside and touch the filtered water. Fold the cloth from all the sides and slightly squeeze the cloth with ragi extract to filter some more water. Then leave some room on top and tie the cloth into a small bag and hang it from any hook or surface, placing a vessel right beneath to collect the dripping water. 

7. After about 8-10 hours or overnight hanging, there would be no more water in the ragi extract and the ragi mass would have solidified slightly. Now carefully remove the bag and untie it. Break the ragi mass into small chunks, with a heavy spoon or laddle.
8. Give some time for the chunks to dry in sunlight and then break them down further. After drying under sunlight for 8-10 hours, finely powder the dried ragi extract in a mixi. Store in an air-tight container.
9. To make the koozh for 1 serving, take a table spoon of the ragi powder and add some water. Mix it thoroughly with a spoon and then after the ragi powder has mixed uniformly, add some more water and stir well. (I bought this small anodized vessel,  during my stay at Chennai, for the exclusive purpose of making Koozh for Abhinav :) as it is very easy with these type of vessels to cook as well as to clean.)
 10. Keep the vessel on stovetop in medium flame and keep stirring. 
11. After about 3 -5 mins, it would start thickening and boiling well with small bubbles forming and breaking. At this time give a final stir and switch off the flame. If you want a more thicker consistency, continue for 2 more mins and then switch off. If desired, a spoon of ghee and some sugar can be added when the koozh is warm.


Suggestions:

  • Organic ragi can also be used. Can also try multi grains with various nuts.
  • For toddlers, ragi can be directly powdered in mill along with cashews, badam, cardamom etc. Need not follow this ragi milk extract method.
  • The traditional method of making the koozh powder follows, sun drying the ragi milk extract (after step 6). But as there was not enough sunlight during November, I had to cut short that to indoor drying process.
  • Sundried Koozh powder lasts longer. 
   So painstakingly prepared ragi powder is definitely worth all the efforts for it nutritiousness.    
   Wish you all a very happy new year 2017 :) 

Wednesday, November 30, 2016

Lemon Pickle Recipe


     As I was editing the pics to create this post on Lemon Pickle, I was wondering what is new in this age old recipe. I made it for the first time all by myself !!!

I am in India for a short vacation of one month. Two weeks flew sooo very fast. Had a good time attending my husband's cousins marriage - needless to say that I ate a lot of delicacies, the lovely Vaazhai Ilai Saapadu (Food served on Banana Leaf) 4 times a day :P  a lot of variety !!! Dressing up... Taking photos.. Eating.. Shopping.. And finally the wedding is over. and the 2 days of gala time came to an end and I turned up to my blog. 
    Last ditch efforts to make a post, so that November 2016 is not left without any posts... Uffff...  So crazy... Sitting and editing the post at 10.45pm in India.. when all are asleep...ZZZzzzz..

Prep Time: 15 mins (plus a week resting time) || Cook Time: 10 mins || Yields: 150 gm || Category: Pickles

Ingredients:

1. Lemon - 2 or 3 (here we get only big ones so I used 2)
2. Gingelly oil - 3 tbsp
3. Fenugreek powder - 2 tsp
4. Red chili powder - 1 tbsp
5. Mustard seeds - 2 tsp
6. Salt - as required
8. Turmeric powder - a pinch
7. Hing - a generous amount

Method:

1. Cut lemon into small pieces. Sprinkle some salt and let it rest for a week. Make sure to give it a shake couple of times daily. Keet an iron kadai (preferably) with gingelly oil. Add mustard and allow them to splutter. Then add a little bit of fenugreek powder and then simmer the flame.
 2. Add a pinch of turmeric powder and then the cut lemon pieces. Stir well to get a uniform coating of all the ingredients. Switch off the flame.
3. Now add required amount of red chili powder and salt and mix well. Switch on the flame and then give a final mixing of chili powder and salt. and then switch off the flame.

Suggestions:


  • Use gingelly oil for a flavourful pickle.
  • Always use a clean dry spoon for serving the pickle.
  • Keep it air-tight and never use your hands to take the pickle.
  • Stir well every time when taking the pickle.
  • Use optimum quantity of salt and red chili powder. Otherwise there are chances that pickle will decay sooner.
  • It is better to refrigerate the pickle after keeping it outside for 2 days.
  • A very important lesson I learnt by experience - Never keep pickles in stainless steel container, as the citric acid in it will corrode steel container and create a hole in it :P I experienced this with Narthangai pickle. My mother-in-law enlightened me with this fact !!


Tuesday, October 25, 2016

Bowtie Pasta in Bechamel Sauce Recipe

     A pasta dish again :P so soon... Yessss Pasta mania.. That is what I am caught with.  Came across a recipe for white sauce in facebook video. It looked simply attractive with all the colorful bell peppers and olives. As the saying goes "You first eat with your eyes". This seemed to be one such recipe when I saw through the video. Though it tasted good, I felt contented only after eating one piece of dosa for the finishing touch. I wonder how kids find the pasta dishes so engaging !!! 

Prep Time: 10 mins || Cook Time: 35 mins || Serves: 2 || Category: Pasta Recipes/Easy breakfast

Ingredients:

1. Bowtie Pasta - 100 gms (any variety of pasta)
2. Coloured bell peppers - (Green, red, yellow/orange)
3. Olive oil - 2 tbsp
4. Butter - 2 tbsp
5. Flour - 1/2 tbsp
6. Milk - 100 to 150 ml
7. Salt - as required
8. Nutmeg - 2 tsp
9. Parmesan Cheese - 1 tbsp
10. Olives, herbs and basil - for garnishing (optional)

Method:

1. Cook pasta as per the instructions in the package.
2. Heat a pan and add a spoon of butter. After it melts, add a spoon of flour and mix well. 
3. After the flour and butter combine well, add warm milk and keep mixing without any formation of lumps. Add some salt and nutmeg. 
4. In another pan, add some olive oil and saute the capsicum till it is almost cooked. Transfer the capsicum to the white sauce and mix well. 
5. Add grated parmesan cheese. Mix well for a few seconds and then switch off the flame. 

Suggestions:

  • Garnish with fresh basil leaves, olives and oregano or other herbs.
  • Any variety of pasta can be used.
  • Nutmeg can be omitted if not available. Instead mixed herbs can be added for the flavour.


Thursday, September 29, 2016

Butternut Squash Kootu Recipe


     It has been almost 2 months since my last post. Was feverishly practising to drive 4 wheeler and obtain my licence, due to which I had to abandon my blog for a longtime. During one weekend we visited a relative at Virgina, who gave us their fresh home grown produce - Butternut Squash. Thanks to Banu akka I could make a new recipe and here it is for the blog :) :)
Haven't tasted this vegetable before and was eager to make something with it. MIL made a spicy kootu the other day and I reserved the remaining to make a simple kootu which my mom makes. The name of the vegetable may sound hi-fi and long, but it resembles the pumpkin family :P in taste. 

Prep Time: 5 mins || Cook Time: 25 mins || Category: Side-dish for rice/roti || Serves: 4

Ingredients:
1. Butternut Squash - 1/2
2. Bengal Gram - 75 gm
3. Grated coconut -100 gm
4. Curry leaves - a sprig
5. Coconut oil - 1 tbsp
6. Mustard seeds - 2 tsp
7. Cumin seeds - 2 tsp
8. Hing - a generous pinch
9. Salt - as required

Method:
1. Rinse the bengal gram and add some water just enough to immerse it and then pressure cook the dal for 2 or 3 whistles. Give it a standing time of 10 mins and then open the cooker.
2. Peel the skin off butternut squash and cut it into small cubes. Wash them and cook them in boiling water for 8-10 mins or until they are cooked softly. 
3. Heat coconut oil and add mustard seeds. After they splutter add cumin seeds, curry leaves, hing and then grated coconut and fry it to light golden brown stirring in intervals.
4. To the cooked dal, add the cooked squash and give a stir. 
 5. Add the golden fried grated coconut tempering and required amount of salt and stir well.

 Suggestions:
  •      Can also add dry red chili to the tempering. 
  •      Instead of sauteing the coconut with cumin seeds, it can also be ground to a paste and added, so that the kootu is more of a gravy like consistency.
  •      I have used coconut oil as it gives a nice taste and aroma.