Thursday, March 17, 2016

Pinwheel Veggie Sandwich Recipe

     Every time we go to Walmart, we make sure to get a pack of white bread. Coz sandwiches make up for quick grab-and-go breakfast on busy mornings. Plus, the Sunbeam white bread is similar to the soft and fresh, right from the oven breads from Bangalore Iyengar's Bakery at Pondicherry. 
     When I was looking for new options to try with the same bread and same vegetables :P I came across this pinwheel sandwich. It caught my eye at once and as it seemed to be easy but still very much appealing to the eye, I tried it out immediately. Yet another reason is the new grilling pan that Mani had bought for me from Walmart. As Abhinav was very quiet and supportive, sleeping on his grandma's lap hearing to some sparrow stories and blinking at her, I could click a few snaps quickly when I made this sandwich for the second time in the same week :D 

Prep Time: 20 mins || Cook Time: 20 mins || Yields: 3 sandwiches || Category: Sandwich/Snack/Breakfast

Ingredients:
1. Carrot - 2 medium
2. Onion - 1 big
3. Tomato - 1 big
4. Capsicum - 1 small
5. Olive oil - 2 tbsp
6. Cumin seeds - 2 tsp
7. Split urad dal - 2 tsp
8. Pepper powder - 2 tsp
9. Salt - as required
10. Coriander leaves - few
11. Grated cheese - as required
12. Bread - 6 slices
13. Corn flour/Maida (All purpose flour) - 2 tbsp (optional)

Method:
1. Wash all the veggies and chop them finely. Heat a pan, add olive oil and fry the cumin seeds and urad dal. 
 2. Add all the chopped vegetables except tomatoes, to the fried cumin seeds and urad dal. Saute for 2 mins and then add the tomatoes, pepper powder and salt. Stir well to ensure even mixing. Cook covered for about 5-7 mins until the vegetables are cooked.
 3. Trim the edges of the bread slices. Using a rolling pin (like the one used for making chappathi) flatten the bread slices. Make a paste with corn flour and little water. Overlap the edges of 2 bread slices, stick them with the paste and make a longer slice. Spread the cooked vegetables on it. Sprinkle some cheese and coriander leaves on top of the veggies.
 4. Carefully roll the flat breads and seal the edge and the sides using the cornflour paste. Place them on a grilling pan or normal dosa pan/tawa. Drizzle with oil flipping both the sides and cook for a min or two.

Suggestions:

  • Chilli flakes can be added for hotness.
  • Oregano, chat masala, garam masala, coriander powder can also be added to enhance the flavour.
  • Adding cheese is optional.
  • Any combination of vegetables can be used, mashed potato onion, corn-spinach, peas-grated broccoli etc.
  • Need not overcook the vegetables, as they are finely chopped.
  • Can also use just plain water to stick the edges, instead of cornflour or maida paste.
Serve hot and crisp with tomato sauce or any dip of your choice. Sure to be a hit among kids !!!

Wednesday, March 2, 2016

Vegetable Kurma Recipe

           I have taken a very long break from my blog posts. I was looking forward to make a come back soon. So, here comes a post on Vegetable Kurma. 
     Very very rarely I order for a vegetable kurma at any hotel, as I dislike its overwhelming spiciness in the aroma as well as its taste. Also, this dish has never been tried at home, till I made it all by myself a few months back, upon a demand from a friend. Though I am still not hooked to its spiciness, I find it manageably okay to have, once in a while. I love it for the colorful combination of vegetables. It involves a lot of vegetables and a little lengthy process but the outcome is worth the effort. It makes a rich side-dish for roti, chappathi, phulka, poori and so on.

Prep Time: 25 mins || Cook Time: 25 mins + pressure cooking vegetables ||  Serves: 4 || Category: Side-dish

Ingredients:
1. Cardamom - 2
2. Cinnamon - 1 small stick
3. Cloves - 3 
4. Bay leaf - 2
5. Jeera (cumin seeds) - 2 tsp
6. Oil - as required
7. Potato - 1
8. Carrot - 2 medium size
9. Beans - 10
10. Cauliflower - 10 florets
11. Green peas - 1 fistful
12. Onion -  1 big
13. Tomato - 2 small
14. Ginger garlic paste - 2 tsp
15. Turmeric powder - 1 tsp
16. Red Chilli powder - 2 tsp
17. Garam Masala - 1 tsp
18. Curry leaves - few
19. Corriander leaves - few
20. Salt - as required
21. Coriander powder - 2 tsp
22. Lemon juice (or) sour thick curd - 1 tbsp (optional)
23. Green chilli - 1 or 2
For grinding into a paste:
24. Grated coconut - 3 tbsp
25. Fennel seeds (perunjeeragam) - 1 tsp
26. Poppy seeds (kasakasa) - 3/4 tsp
27. Cashews - 6
28. Roasted split gram (pottukadalai) - 1 tbsp

Method:

1. Cut all the vegetables (potato, carrot, beans) into small cubes, wash them. Cut the cauliflower into bite sized florets and immerse them in hot water for 5 mins, adding salt and turmeric powder. 
2. Pressure cook all the vegetables for 2 whistles adding little water. Grind all the ingredients mentioned for the paste, with sufficient water.
3. Heat oil in a pan and add bay leaves, cinnamon, cloves, cardamom, cumin seeds and saute them for a min. To this add the chopped onions, green chilli, ginger garlic paste, turmeric powder and saute until the raw smell goes off.
4. Add the chopped tomatoes, red chili powder, garam masala and saute until the tomatoes turn mushy.
5.  Add the ground paste to the onion tomato mixture and saute until the raw smell goes off.
6. Add the cooked vegetables and some water to adjust the consistency of the gravy. Add required amount of salt, green peas, curry leaves, coriander leaves and switch off after one boil.
Suggestions:
  • Can either cook the vegetables in pressure pan or parboil them in a vessel separately.
  • Lemon juice or curd is optional. I have not added them as I did not want tanginess.
  • Using a variety of vegetables gives a very good flavour. Especially the cauliflower and peas.
  • Adding more amount of poppy seeds gives a drowsy feel.
  • Combination of vegetables added is entirely based on availability and one's preference.
Makes a very good combo with roti, chappathi, puri, phulka etc.


Friday, February 5, 2016

Spinach Corn Cheese Sandwich Recipe

      Sandwiches are an easy grab-and-go wholesome breakfast with lots of variations that can be imparted in the stuffing, which make it more interesting and unique. Have been making this spinach corn cheese sandwich for a while after coming to USA. As spinach is the only tasteworthy green that is available here, it becomes inevitable to explore alternatives to include spinach in an interesting form in dishes. So, here comes an easy cheesy sandwich with the goodness of spinach :)

Prep Time: 10 mins || Cook Time: 15 mins || Yields:  4 Sandwiches (4 Triangles) || Category: Sandwich / Kids Recipe / Breakfast


Ingredients:

1. Spinach - 1 bunch
2. Olive oil - 2 tbsp
3. Oregano - 2 tsp
4. Golden corn - 4 tbsp
5. Salt - as required
6. Pepper - 1 tsp
7. Chili powder - 2 tsp (optional)
8. Mozarella cheese - 4 tbsp (grated)
9. Ghee - to smear over the sandwich

Method:

1. Heat a pan and add olive oil. Add the oregano followed by cleaned, washed and chopped spinach giving a quick stir. Saute for 2 mins.
2. Add the golden corn, salt, pepper and chili powder and give a stir. Saute for few mins until the water from spinach and corn evaporates. Once done, switch off the flame and allow the mixture to cool to room temperature.
3. Spread a layer of grated mozarella cheese on both the bread slices and spread the spinach mixture on one slice. If desired, sprinkle some more cheese in the middle and close the two slices. Smear the top and bottom sides of the sandwich with ghee and toast it. 
4. Cut the sandwich into desired size and serve warm with tomato ketchup or any dip.

Suggestions:


  • I used frozen corn, as fresh corn is not available. 
  • Oregano can be skipped or replaced with any other dried herb.
  • The outer edges of the bread can be trimmed and toasted in a sandwich maker or in a normal tawa on stove top.

Tuesday, February 2, 2016

Podi Tossed Mini Idly Recipe

     A regular normal idli for a breakfast or evening tiffin might not be inviting or of much interest for many. But there is always a WOW factor associated with a mini idli. That too when it is tossed in idli milagai podi or any other colourful spicy podi. Had been waiting to try these tossed podi idlies for a while since I came here. But I had to wait for the mini idli plates, as I did not bring them with me when I started from India.  I was all excited when I got the mini idli plates from my mom along with curry leaves powder and other eatables recently :P So, the wait is over and its time for gobbling up those mini spicy treats.

Prep Time: 5 mins || Cook Time: 25 mins || Yields: 20 mini idlis || Category: Breakfast/Starter/Finger Food


Ingredients:

1. Idli Batter  - sufficient for 20 mini idlis
2. Idli milagai podi - 4 tbsp
3. Curry leaves powder - 4 tbsp
4. Gingelly oil/Ghee- 3 to 4 tbsp

Method:

1. Grease the idli plates with gingelly oil and fill with idli batter. Steam the batter for 10-15 mins, initially on high flame for 10 mins and then in low flame for 5 mins or until the idlis are cooked soft. Cool the idlis to room temp.
2. For the batch of green colored coating on the idlis, mix normal idli milagai podi with curry leaves powder.
3. In a pan, heat oil or ghee as desired and throw in the required amount of normal idli milagai podi.
4. Toss the idlis in the pan so as to get them coated with the chili powder all over. If more spiciness is required, sprinkle some dry idli milagai podi over the already coated idlis, as it would stick to them easily.
5. Similarly, repeat the process from 3 and 4 for the batch of green colored idlis with curry leaves powder. Serve by stacking two mini idlis of different flavours with a toothpick inserted at their center to keep them intact. 

Suggestions:


  • Ghee or gingelly oil or any cooking oil can be used. I didnt like the ghee flavour. So, I avoided it for the green coloured batch of idlis.
  • I have used the plain curry leaves (dried and powdered curry leaves) powder and mixed it with idli milagai podi. Instead, a readymade spicy Karuveppilai Podi can also be used.
  • As I wanted the spiciness to be mild, I didnt sprinkle much of dry milagai podi on the coated idlis. So, the colour might not be that bright as in restaurants.
  • Can also try this combination exclusively for mini idlis - 1 part urad dal and 2 parts idli rice soaked for 2 hours and ground fluffy/with granular consistency. 


Tuesday, January 26, 2016

Kovakkai Poriyal Recipe / Tindora Poriyal Recipe

     I have a vague memory of this vegetable making a foray at our home. That too i remember tasting it only around my high school days. Instantly, I was hooked to its taste. With any tasty and fanciful side-dish (one that is fried with more oil and is crispy or browned intentionally), I have the habit of mixing it with a small portion of plain cooked rice and adding a drop of gingelly oil or ghee before starting with the real lunch or dinner. For such a starter, this vegetable is a bliss !!

Prep Time: 10 mins || Cook Time: 30 mins || Serves: 3 || Category: Side-dish for rice

Ingredients:
1. Tindora (Kovakkai) - 200 gms
2. Turmeric powder - 2 tsp
3. Red chili powder (or Sambar powder) - 1 tbsp
4. Pepper powder - 1 tsp
5. Hing - 2 tsp
6. Bengal Gram (Kadalai paruppu) - 2 tsp
7. Cumin seeds - 2 tsp
8. Oil - 2 tbsp
9. Mustard seeds - 1 tsp
10. Salt - as required

Method:

1. Wash the tindora and remove the edges from it. Cut it into desired shape. I cut it lengthwise. It can also be slices into thin circular disks. Take the chopped tindora in a bowl and add turmeric, salt, hing, pepper powder, chili powder and toss it well. Keep aside for 15-20 mins for the flavours to get absorbed well.
2. Heat a pan with oil and add mustard seeds, bengal gram, cumin seeds and fry them till golden brown. Add the tindora and give a stir. Keep covered and cook for 5-7 mins in medium flame.
3. Open the lid and stir the vegetable, adding required amount of salt. Add a tbsp of oil if required and cook uncovered for 5-10 mins until the vegetable starts to become slightly crisp and brown.

Suggestions:
  • The spice powders can be added at the time of cooking too, instead of sprinkling on raw tindora and keeping it aside for a while.
  • Gingelly oil can be used for giving a good flavor.
Pairs up well as a side dish for rice and also with Chappathi/roti etc.


Wednesday, January 13, 2016

Red Bean Tortilla Wrap Recipe

     This red bean tortilla wrap is a slightly lighter version of a Mexican Burrito. When I had moved in to USA, my husband got me a Burrito from Chipotle, the mexican fast food chain. I liked to have it once in a while mostly when I feel bored to cook a routine South Indian lunch. The burrito will be so big for me that I will mostly find it impossible to finish it up in one sitting :P 
     To try the burrito at home long time back, I shopped all the ingredients and made up my mind and fixed a schedule. But as the date neared, I got stuck up with an impression that it involved too much work :p and so why not make it a little simpler. Thats when evolved, this red kidney bean tortilla wrap. 

Prep Time: 15 mins || Cook Time: 20 mins + cooking time for Rajma || Serves: 3 || Category: Tortilla Wrap/ Breakfast / International Recipe

Ingredients:
1. Olive oil - 2 tbsp
2. Onion - 1 big
3. Capsicum - 2 small (Red & Green)
4. Oregano - 2 tsp
5. Pepper - 2 tsp
6. Salt - as required
7. Avocado - 1 small
8. Lemon - 1
9. Tomato - 1
10. Olives - 8 or 9
11. Mozarella cheese - 50 gms (grated)
12. Red kidney bean (Rajma) - 100 gms (pressure cooked)
13. Coriander leaves - 2 tbsp
14. Tortilla - 6 

Method:
1. Chop onion, capsicum into long thin pieces. Heat a pan with olive oil and add oregano. 
2. Add the onions and saute for 2 mins or until translucent. Then add the capsicum and pepper powder and give a stir. Saute for 5 mins and keep the lid closed.
3. Allow the vegetables to brown, so that they get a slight smoky flavor and then switch off the flame. Cut the avocado into half and scoop out the pulp, discarding the seed. 
4. Add lemon juice and salt to the pulp and mash it with a spoon. Chop the tomato, slice the olives and grate the cheese. Soak rajma overnight and pressure cook for 5-6 whistles.
5. Heat a dosa pan and warm the tortillas on both the sides. Once done, place the tortilla on a plate. Spread the sauteed vegetables; over them place the boiled kidney beans and over that spread a layer of guacamole (avocado pulp). Then top it with olives, tomatoes and a generous amount of cheese. Sprinkle a few coriander leaves. Microwave for 20 seconds for the cheese to become gooey and then serve warm.

Suggestions:

  • Black bean or any other kind of bean can be used instead of red kidney bean.
  • I used raw beans and then soaked overnight and pressure cooked for 5-6 whistles. Instead of that pre-cooked canned beans can also be used.
  • Using olives is optional. 
  • The combination of vegetables can be altered as per one's choice.
  • Can also add cooked white rice or brown rice to make it more filling for lunch or dinner.
  • It is advisable to mix lemon juice to guacamole (avocado pulp) and consume it at one go without refrigeration or reheating, as it will turn black if left uncovered and un-refrigerated for longtime.
  • I used store-bought tortillas. They can also be home-made using multipurpose flour and water like regular chappathi/roti.


Friday, January 8, 2016

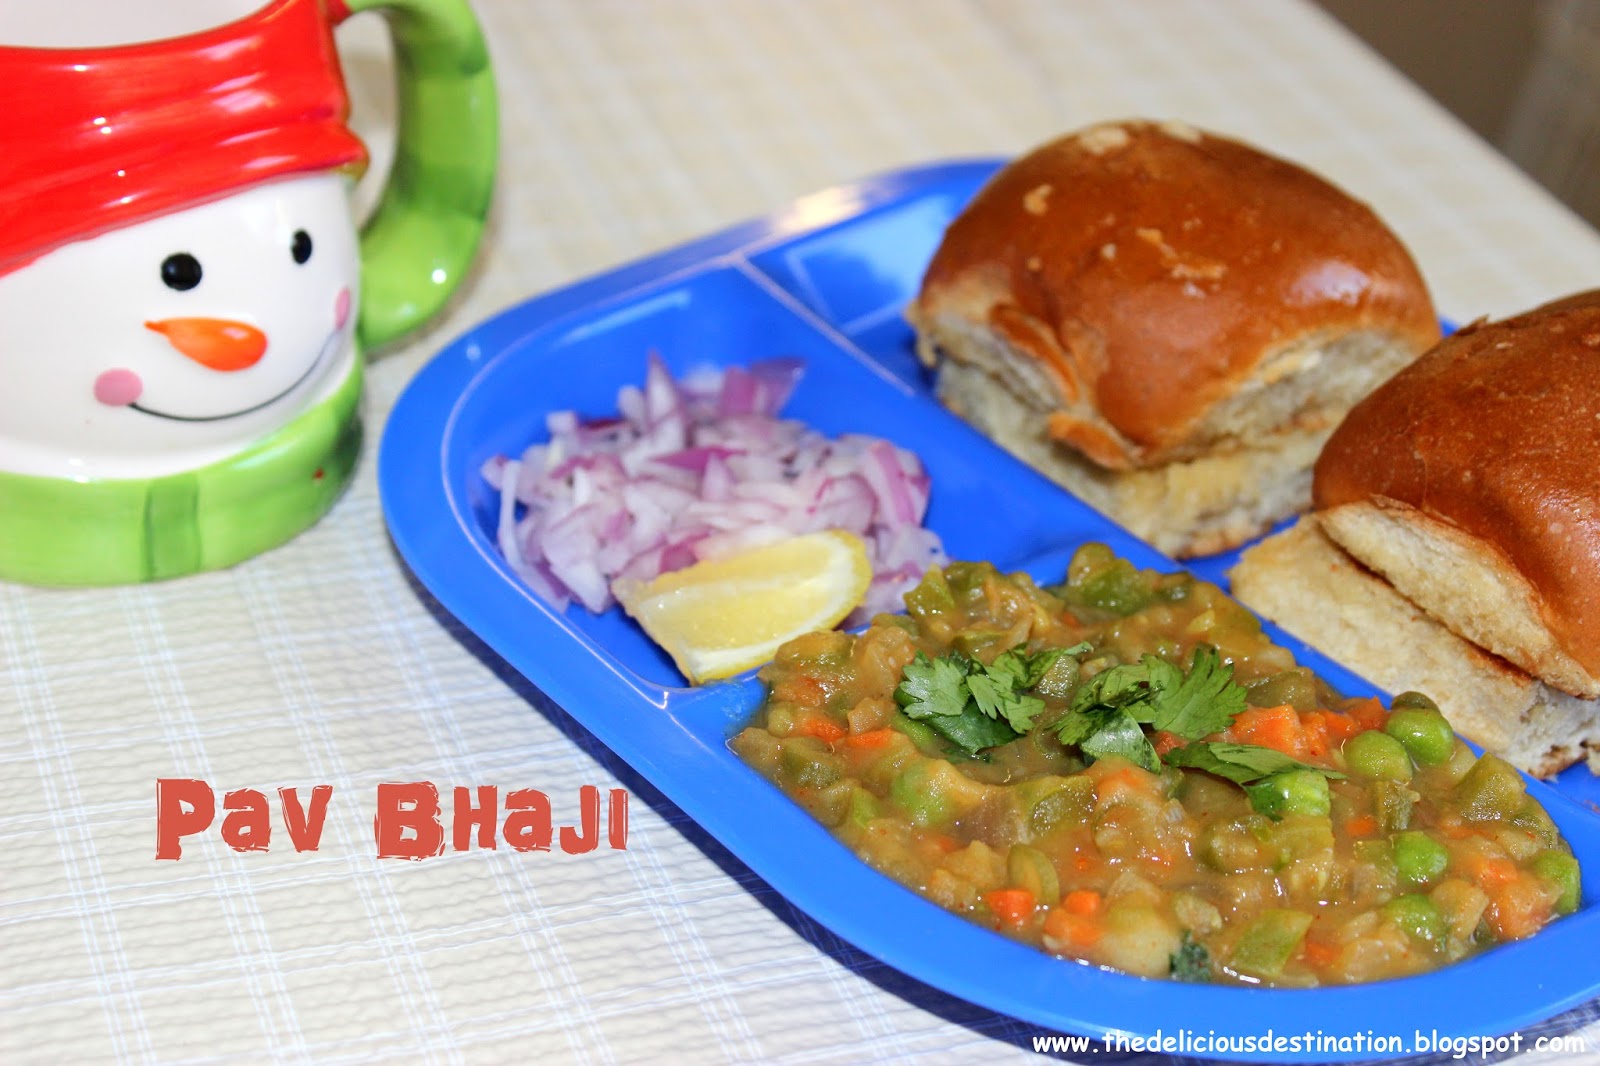
Pav Bhaji Recipe

     Pav Bhaji - I love it !! More than just the taste, it carries special and specific reasons too... The memory associated with a good pav bhaji dates back to my office days in TCS Chennai :) 
     I would be in a hurry to board the 5.45 bus back from office. On my way, when I see through the glass doors of HSB - Hotel Saravana Bhavan inside my office campus, I would be so tempted to step in and have a bite of the king of chat - Pav Bhaji. 
     Even with my watch grinning at me showing 5.15 pm, I would ignore the time; step-in and get a bill for pav bhaji. It would be 5.20 by the time I wade through the sea of restless hands in the crowd at the chaat counter and give the bill to the fellows who prepare my delicious chaat. Restlessly I would be waiting looking at my mocking watch every 10 secs, as the chaatwala heats the bhaji, chops onions, toasts the pav, arranges the onions and lemon in a plate, then puts a laddleful of bhaji on to every plate and finally hands over to the waiting crowd (which inlcused me too !! ). The time would now be 5.32 and needless to say I would be in a state of tensed joy after receiving mine.
      I would call my friend (!!) at the bus to hold a place for me :P Gobbling the pav bhaji without even looking around and taking a moment to breathe, I would start from HSB by 5.40 pm. By then the buses would be ready for their take-off.
      If Usain Bolt were to run along with me to catch the bus, I would run past him :D and reach the bus just in time. Then comes the tricky part. I have to identify which bus to board. As I would be on call with my FRIEND (Little did I know then, that on one fine day we would join hands for a life-time of togetherness and friendship) he would come out and stand near the steps for my easy identification of the bus. Panting breathlessly and with a dry throat not allowing me to speak for a good 5 mins, I would get into the bus crossing the weird glances of the bus driver and notorious co-passengers !!

Prep Time: 20 mins || Cook Time: 25 mins + 15 mins (for cooking potato) || Serves: 4 || Category: Side-dish/Subzi, Chaat

Ingredients:


1. Oil - 2 tbsp

2. Onion - 1 big
3. Ginger garlic paste - 2 tsp
4. Tomato - 1 big (de-seeded) 
5. Turmeric powder - 1 tsp
6. Capsicum - 1 big
7. Beans - 10 to 15
8. Carrot - 3 medium
9. Potato - 2 big (boiled and mashed)
10. Green peas - handful
11. Salt - as required
12. Pav Bhaji masala - 1 tbsp 
13. Sugar - 1 tsp (optional)
14. Butter - 1 tbsp
15. Coriander leaves - 2 tbsp finely chopped

Method:
1. Add oil in a pan and saute the onions till they are translucent. Add ginger garlic paste, tomato, turmeric powder and saute for 2 mins. Keep covered for a few mins until the tomatoes have got cooked well.
2. Then add capsicum, beans, carrot and cook for about 5 mins. Cook covered until the vegetables are cooked. 
3. Now add boiled and mashed potato, green peas and add sufficient water to get the desired consistency of the bhaji. Add salt and cook covered for 2 mins. 

4. Add the pav bhaji masala, sugar and required amount of salt and mix well. Add a tbsp of butter and cook until it melts and switch off the flame. Lastly add finely chopped coriander leaves and switch off the flame. Bhaji is ready !!
5. Now heat butter in a tawa and toast the half slit pav buns on both the sides until golden brown.

Suggestions:

  • Using potato equivalent to the quantity of all other vegetables gives a perfect consistency to the bhaji.
  • All vegetables should be finely chopped.
  • Addition of sugar is optional.

Enjoy the yummilicious combo of hot Bhaji & toasted pav with finely chopped onion and lemon wedge.